May is Deck Safety Month, so it’s a good time to discuss deck inspections. The best way to know if your deck is safe is to have it professionally inspected. If you’re not keen on hiring a home inspector or carpenter to inspect your deck professionally, you can still inspect some basic things yourself.
Building Code Requirements
For Minnesota, we use section R507 of the Minnesota Residential Building Code for most of our deck requirements. This section was added to our building code when we adopted a new residential code at the beginning of 2015, and it brought a fair number of changes: New building code rules for decks in Minnesota. If you’re outside Minnesota, your building code is probably very similar to ours and probably relies on section 507 of the International Residential Code.
While the building codes are the ultimate authority when it comes to building a deck, there’s another document that makes it very easy to understand exactly what the building code requirements for decks are. This is called the Prescriptive Residential Wood Deck Construction Guide, and it’s fantastic. If you build decks, inspect decks, plan to build a deck, or just want some great info on how to properly build a deck, download this free guide from the American Wood Council. It’s also known as DCA-6. Let me repeat, however, that this guide is not the final say in your area; it’s just a helpful guide that helps you interpret what the codebook says. Ok, now that we’ve got that stuff out of the way, let’s dig into some specific stuff to inspect.
Attachment to the house
The most common reason for deck collapses is improper attachment to the house.
If a deck is supported on one side by the house, the attachment to the house is critical. There are three basic ways of doing this:
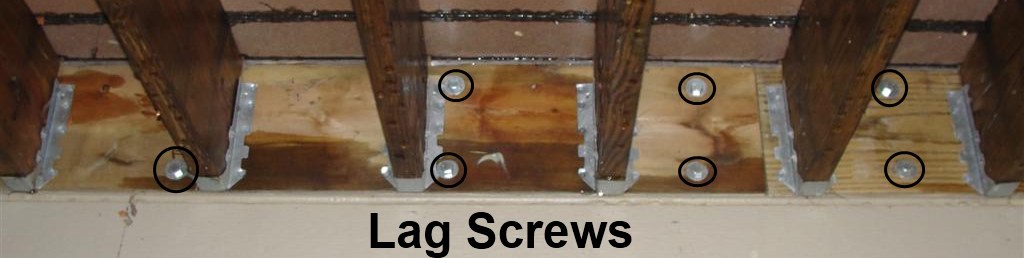
Lag Screws

Traditionally, lag screws have been the most common method of attaching decks to buildings. To properly attach a deck ledgerboard using 1/2″ lag screws, 5/16″ holes need to be pre-drilled through the ledger and rim joist. After that, a 1/2″ hole should be drilled through the ledgerboard only. You won’t have any way of knowing this was done properly just looking at the deck, however. The best you can do is to make sure you have a bunch of these lag screws installed, and they always need a washer behind the head. The diagram comes from DCA-6.

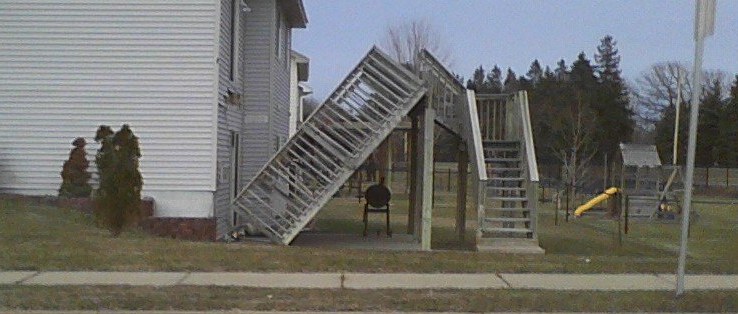
And just for fun, let’s dig into a specific example to get an idea if someone used enough lag screws. For these specific spacing and installation instructions, Minnesota residents would use table R507.9.1.3(1) of our building code, but anyone else would turn to Table 5 of DCA-6. Does the deck pictured below have enough 1/2″ lag screws?
To know for sure, we’d need to know the length of the deck joists, and we’d also need to know the material behind the ledgerboard. Let’s say the span of the deck joists is 16′, and the rim joist behind the ledgerboard consists of traditional 1-1/2″ lumber. According to Table 5 of DCA-6, lag screws need to be installed every 11″.
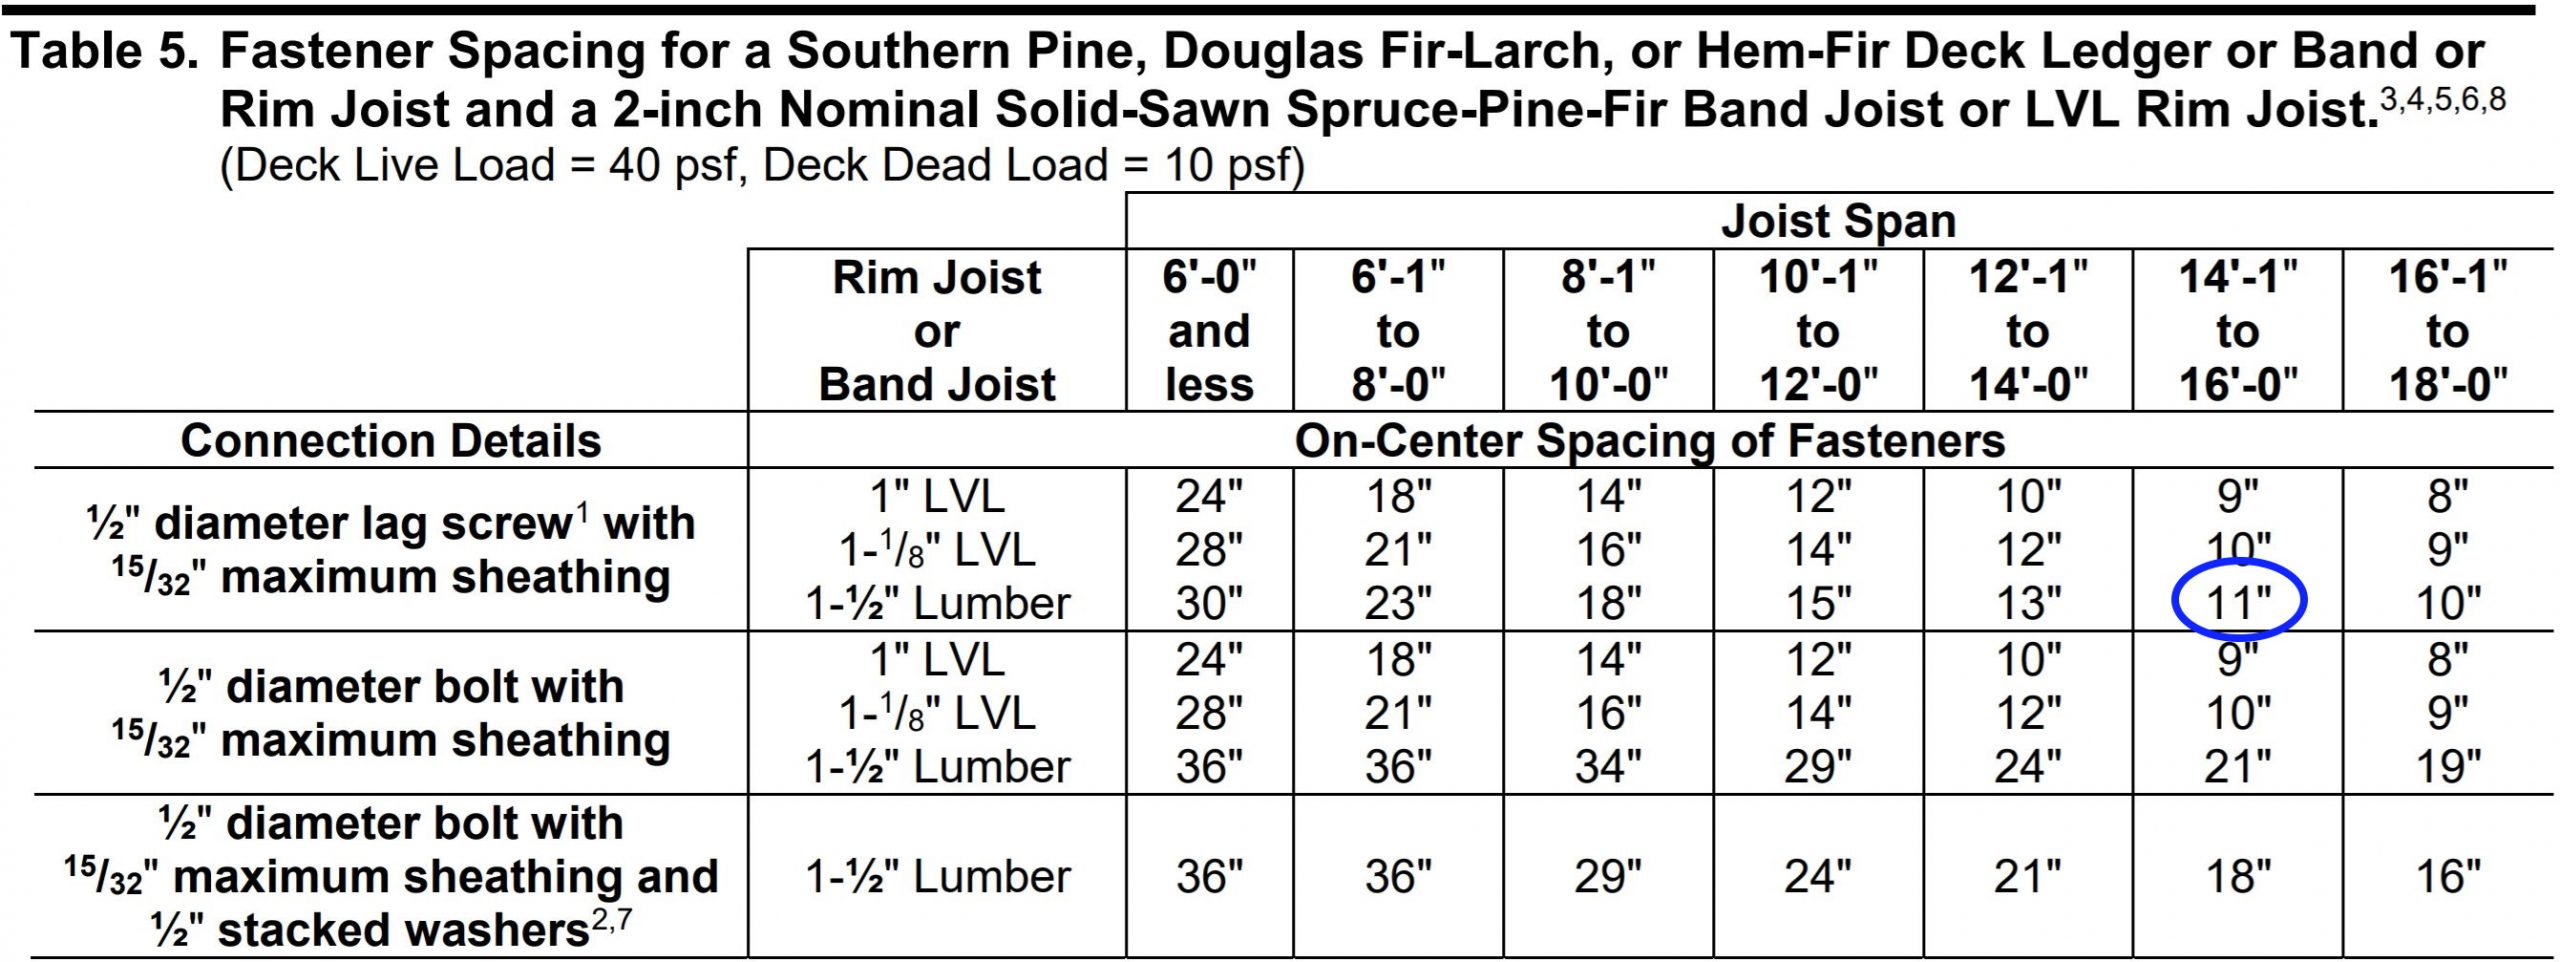
Do we have that here? It looks like those joists are spaced 12″ on center, so probably not… but there’s more to it. The 11″ spacing requirement is for lag screws staggered at the top and bottom of the ledgerboard, as shown in the diagram below, again from DCA-6.
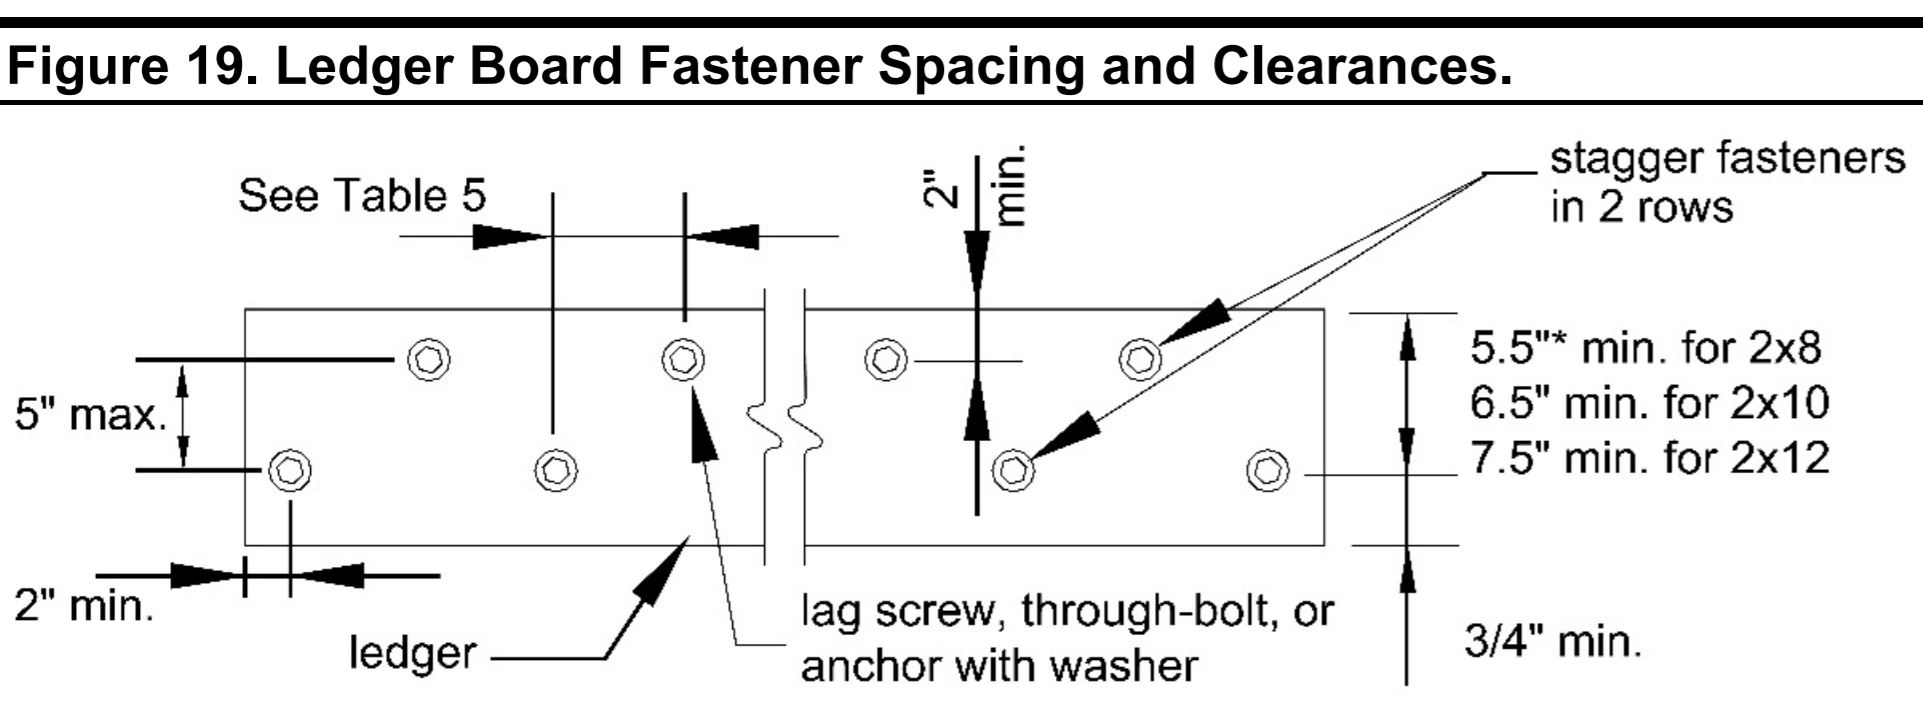
The person who built the deck above probably didn’t know about staggering the fasteners, so they ended up using nearly twice as many as they needed to. I’d say this deck looks good. This is probably more info than you came here for, but I think it’s nice to have a general idea of how to find this information if you’re really interested in getting these details right.
Through-Bolts
Through-bolts can also be used to attach a deck, and they’re probably the most labor-intensive way of doing it. This consists of a 1/2″ bolt going all the way through the deck ledgerboard into the house and a nut and washer installed inside the house. Or vice versa, with the nut and washer visible on the exterior. If you don’t have access to the framing of the house, this isn’t an option. When these are done properly, what you’ll see on the exterior of the deck is about the same as what you’d need with lag screws.
You’ll see a hex head and a washer, and the spacing requirements aren’t quite as strict. If you see round heads on the fasteners, you’re looking at carriage bolts. These were commonly used on decks in the past, but they’re no longer acceptable. The problem is that they’re not designed to be used with washers, so the surface area that makes contact with wood isn’t sufficient. This can lead to the heads crushing into the wood and losing a lot of their holding power.
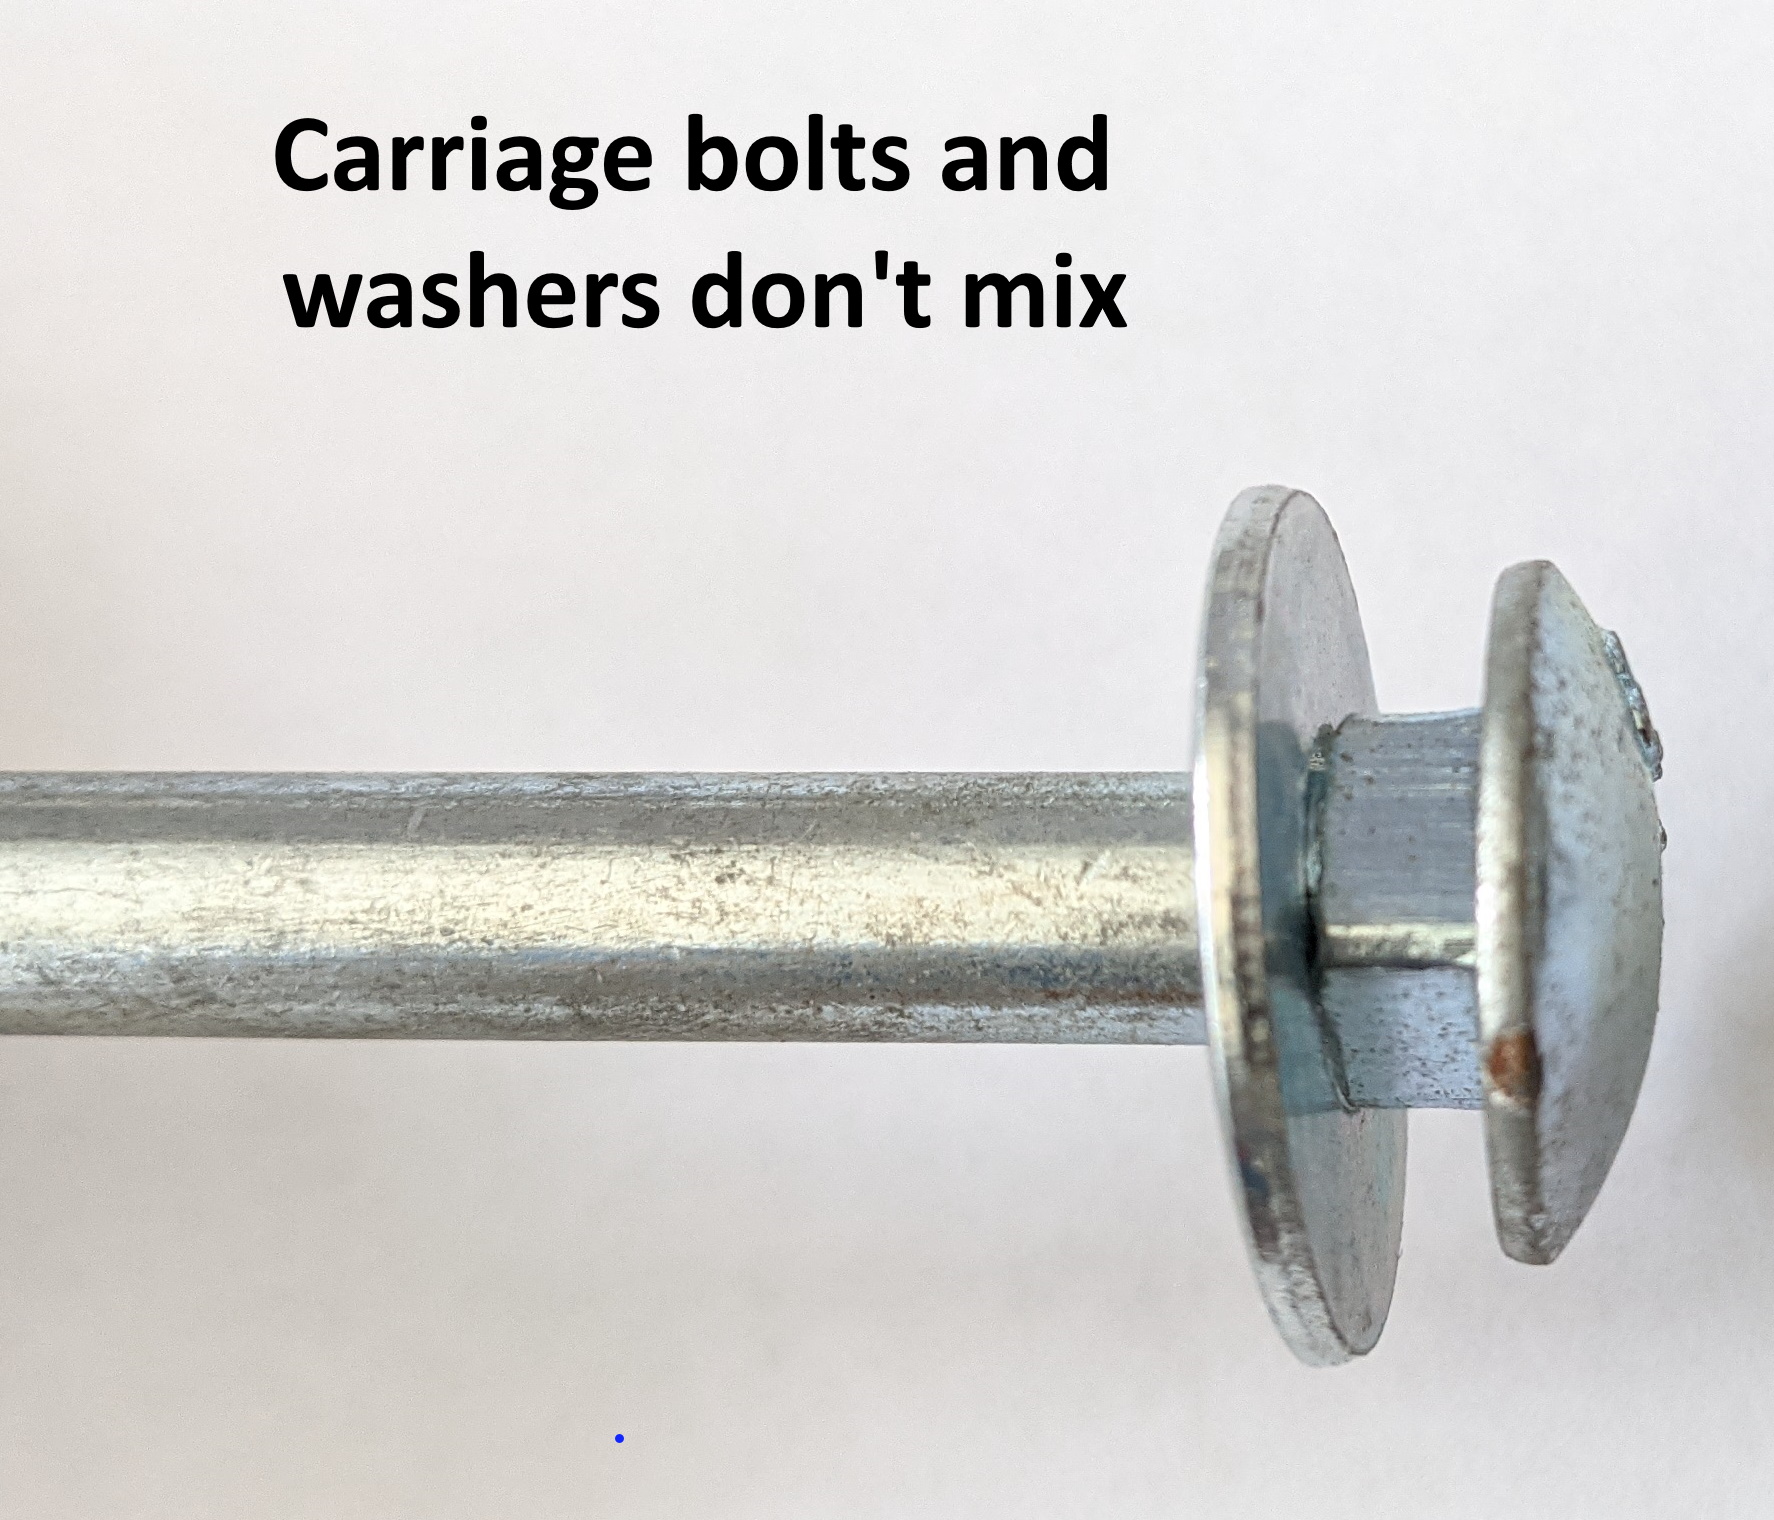
If your deck is attached this way and the heads aren’t sucked into the wood, I wouldn’t make a big deal about it. But don’t do it this way on your next deck.
Special Ledger Screws
The new-school way of attaching a deck ledgerboard to a house is to use a special fastener made just for this job. Ledgerboard fasteners are code-approved one-trick ponies made by Simpson and FastenMaster, and they’re easy to install. You don’t need to do any pre-drilling, and you don’t need access to the interior. You simply use a drill or impact driver to sink them right into the wood.
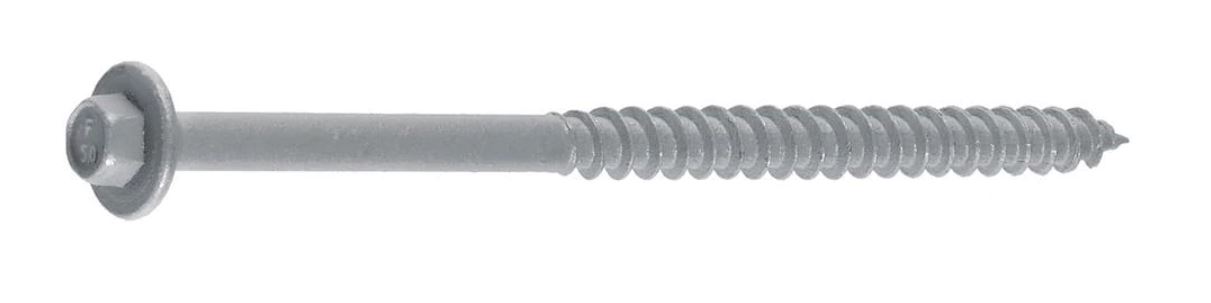
Beware, however, that you can’t use the tables in DCA-6 to determine how many of these to use; instead, you must rely on the manufacturer’s installation instructions.
Anything Else
If your deck is only attached to the house with nails or screws, it’s not enough. The easiest solution is probably to get yourself a box of ledgerboard fasteners and go to town, assuming you have the right material behind your ledgerboard.
Lateral Load Connectors
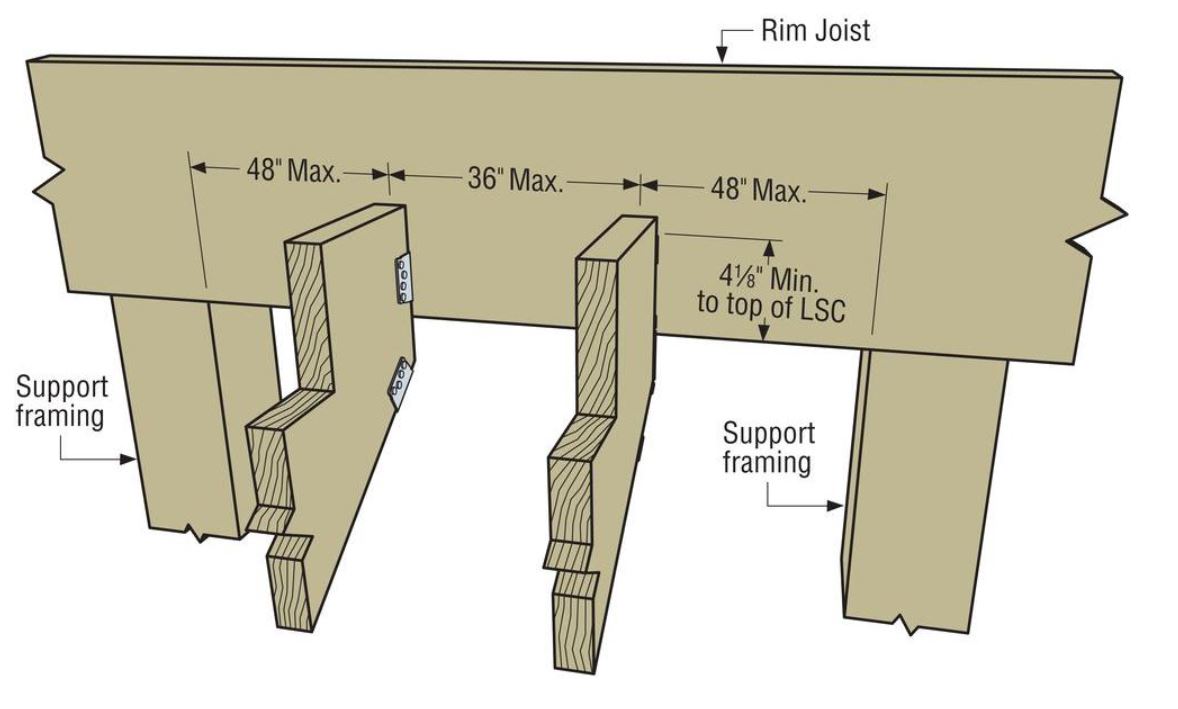
I can’t talk about proper deck attachment without at least mentioning lateral load connectors. While all of the methods that I mentioned above help to support vertical deck loads, Minnesota also began requiring decks to have lateral load support back in 2015. In my own words, it means you need some special brackets added to help prevent the deck from pulling away from the house. If you’re an engineer or you’re as anal as an engineer, you might consider adding these to your existing deck to make it safer. To learn about these, check out my blog post that covered the 2015 updates to the Minnesota deck code.
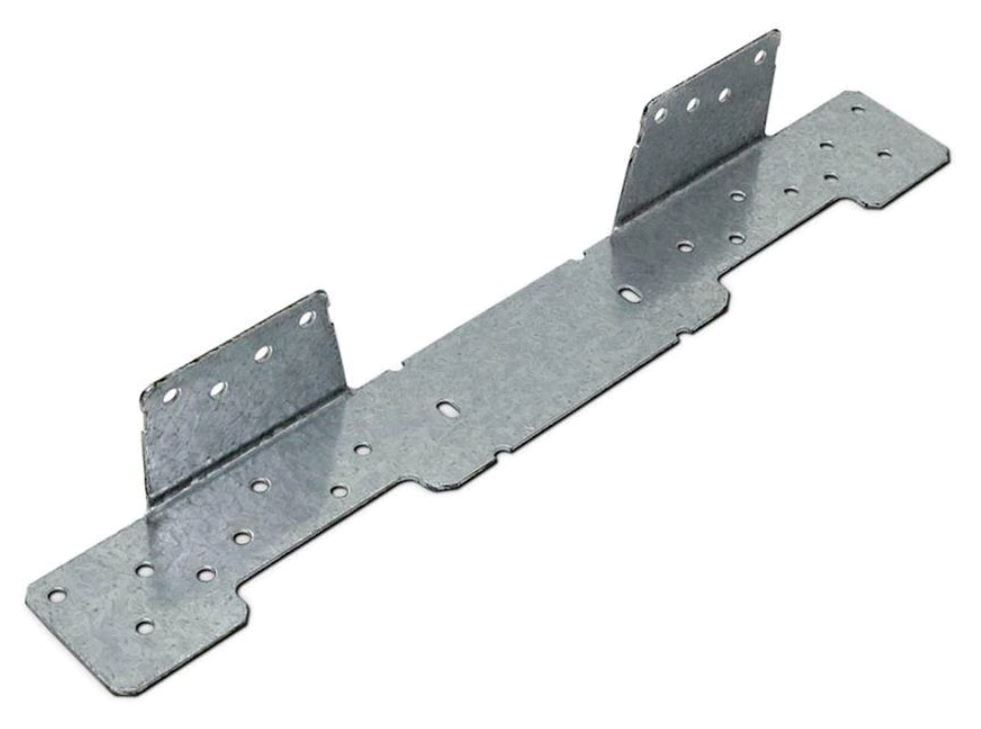
Here’s the short and quick solution: Get yourself four DTT1Z fasteners and install them according to the manufacturer’s instructions. Also, here’s a two-minute video clip showing how they’re installed:
Don’t attach here
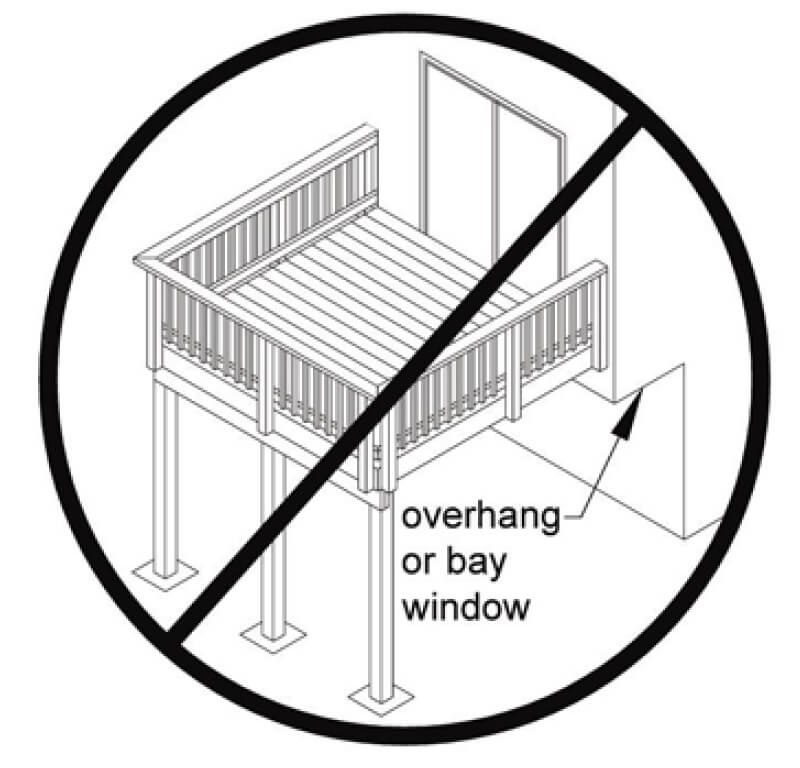
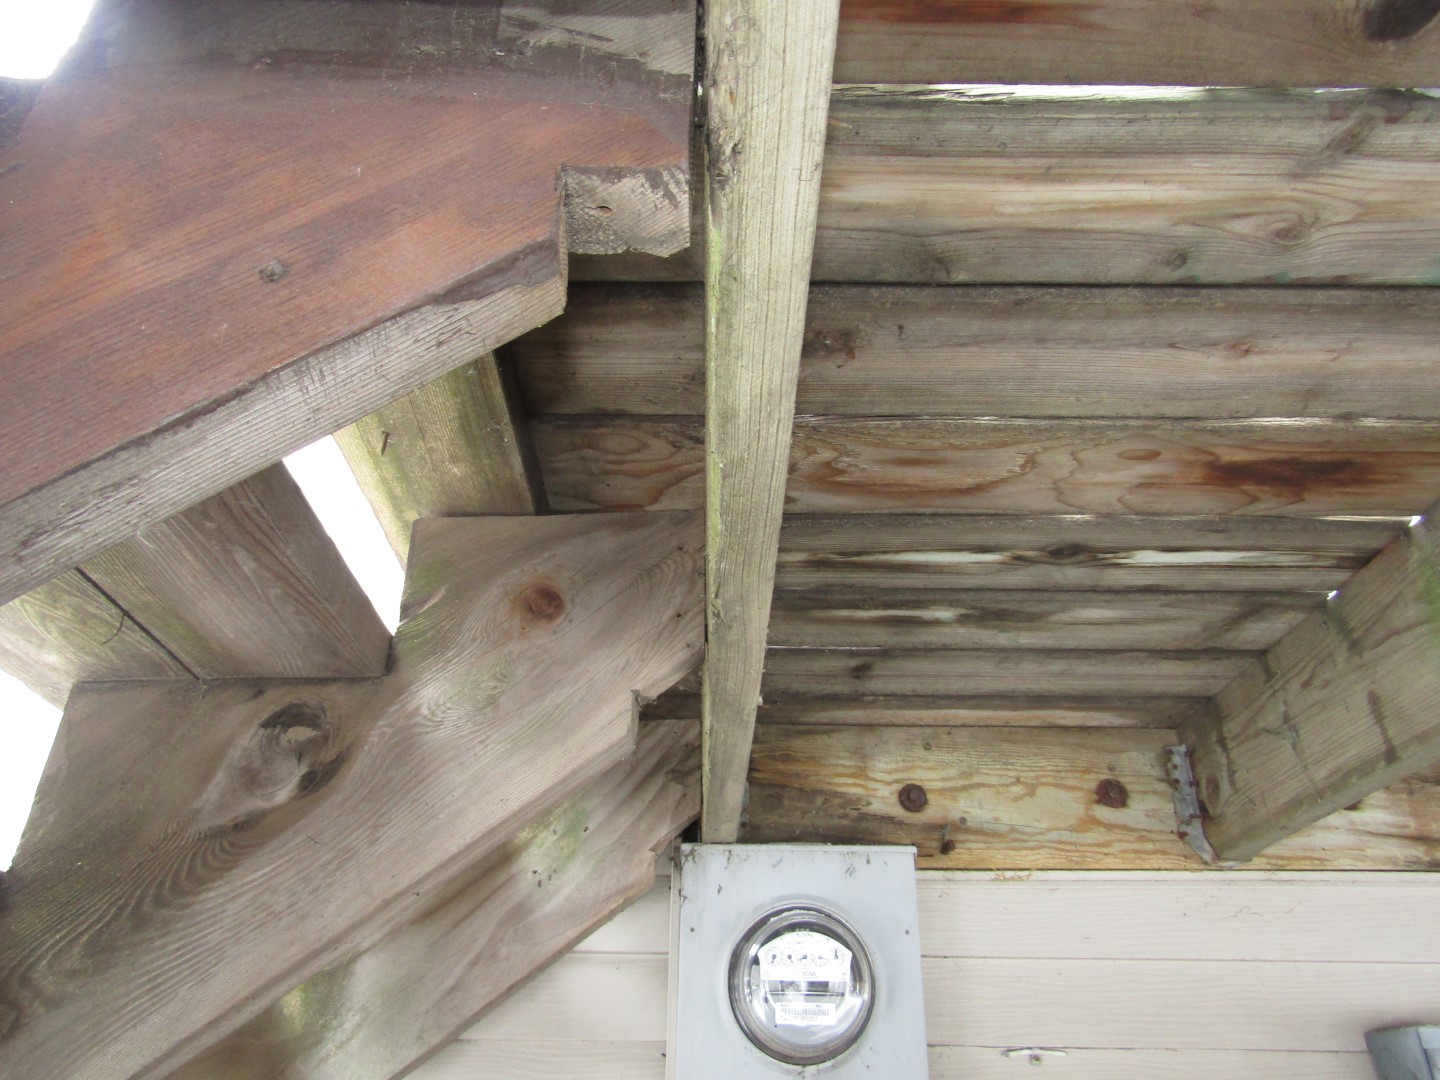
Decks should never be supported by cantilevered floors because they’re not designed for this additional load. See my blog post about the problem with attaching a deck to a cantilevered floor. Also, decks shouldn’t be attached through exterior veneers such as brick or stone siding, for the most part. Simpson does make a special fastener that will allow you to do this, but I’ve never actually seen one installed. See my blog about decks attached through brick veneer to read more about this.
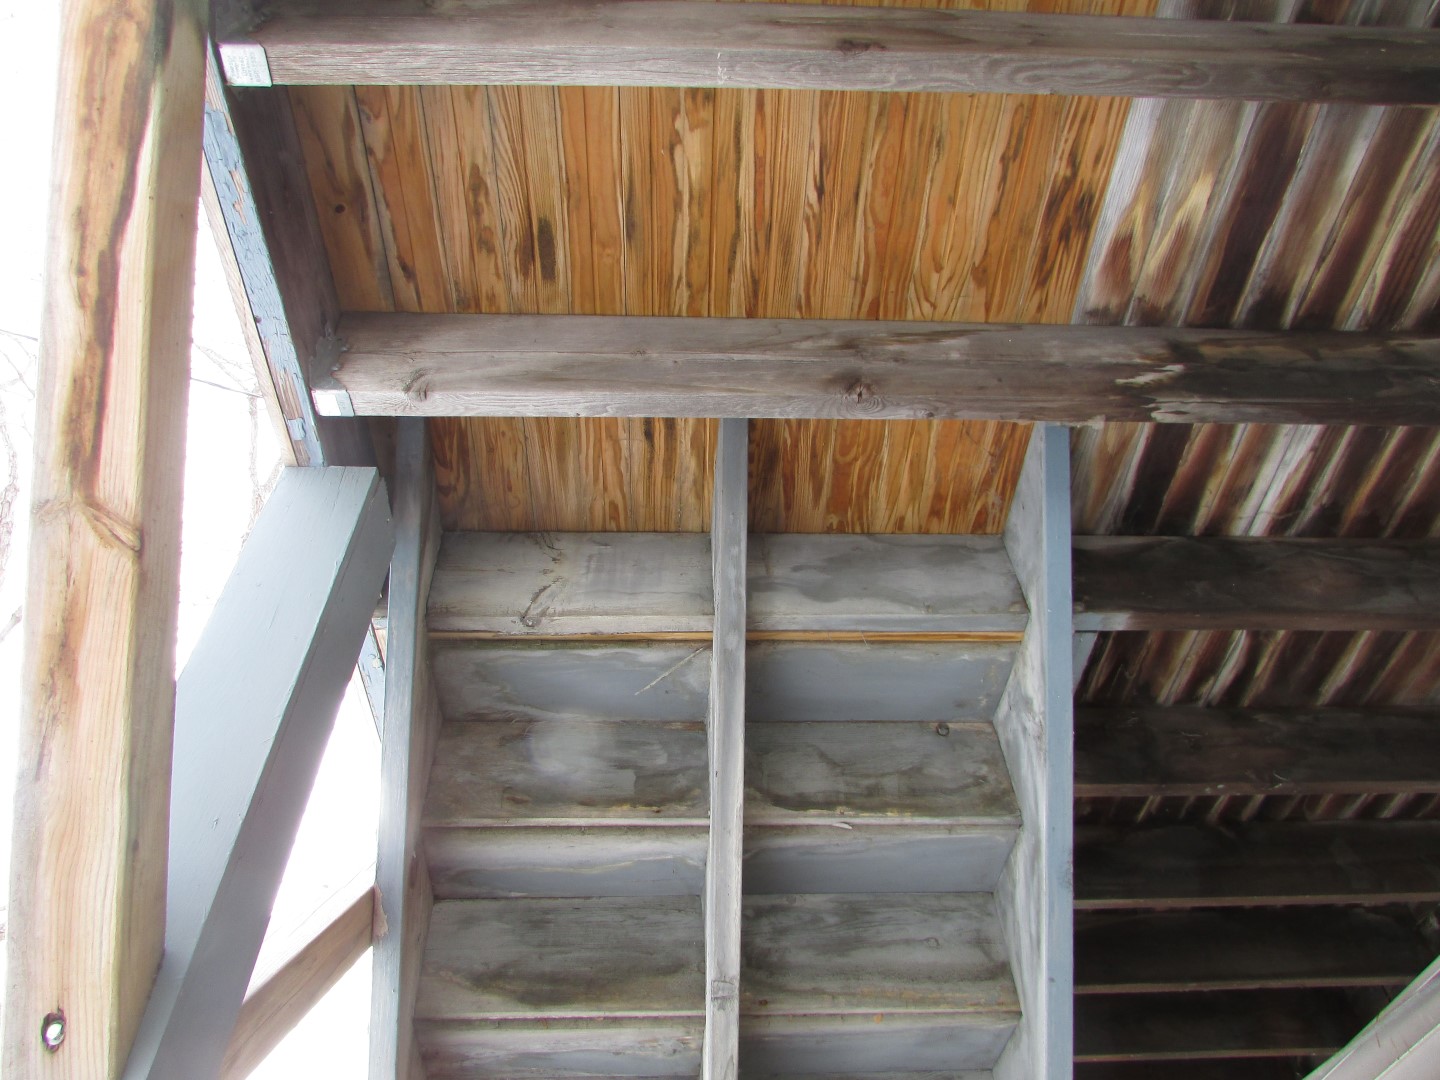
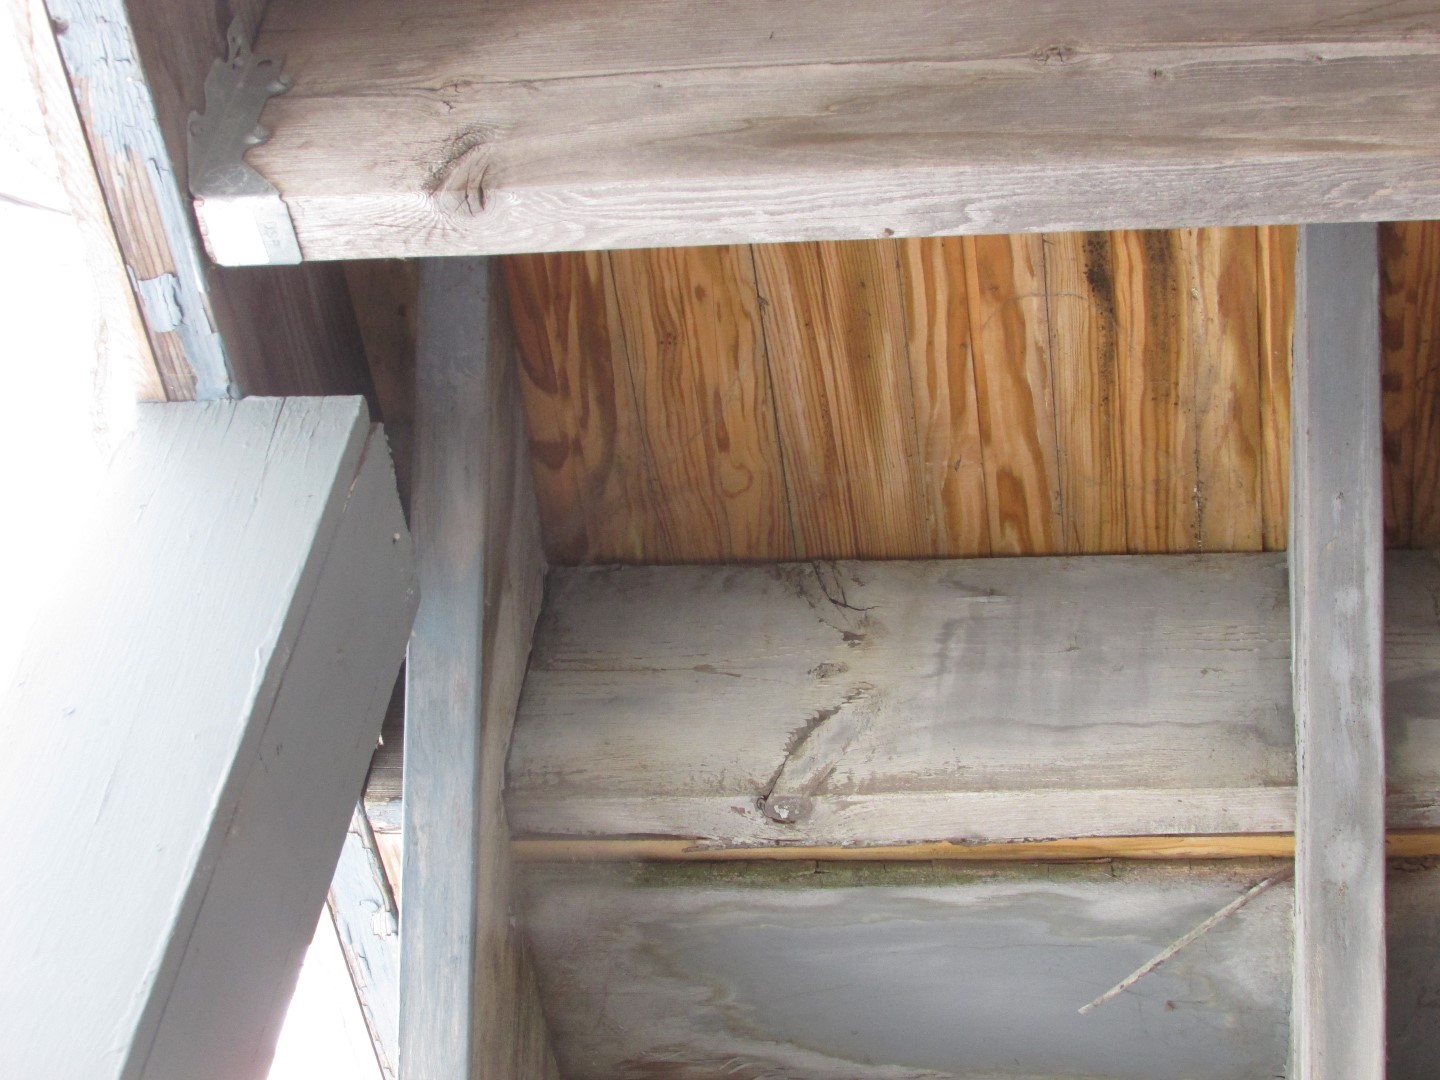
Improper flashing at the house
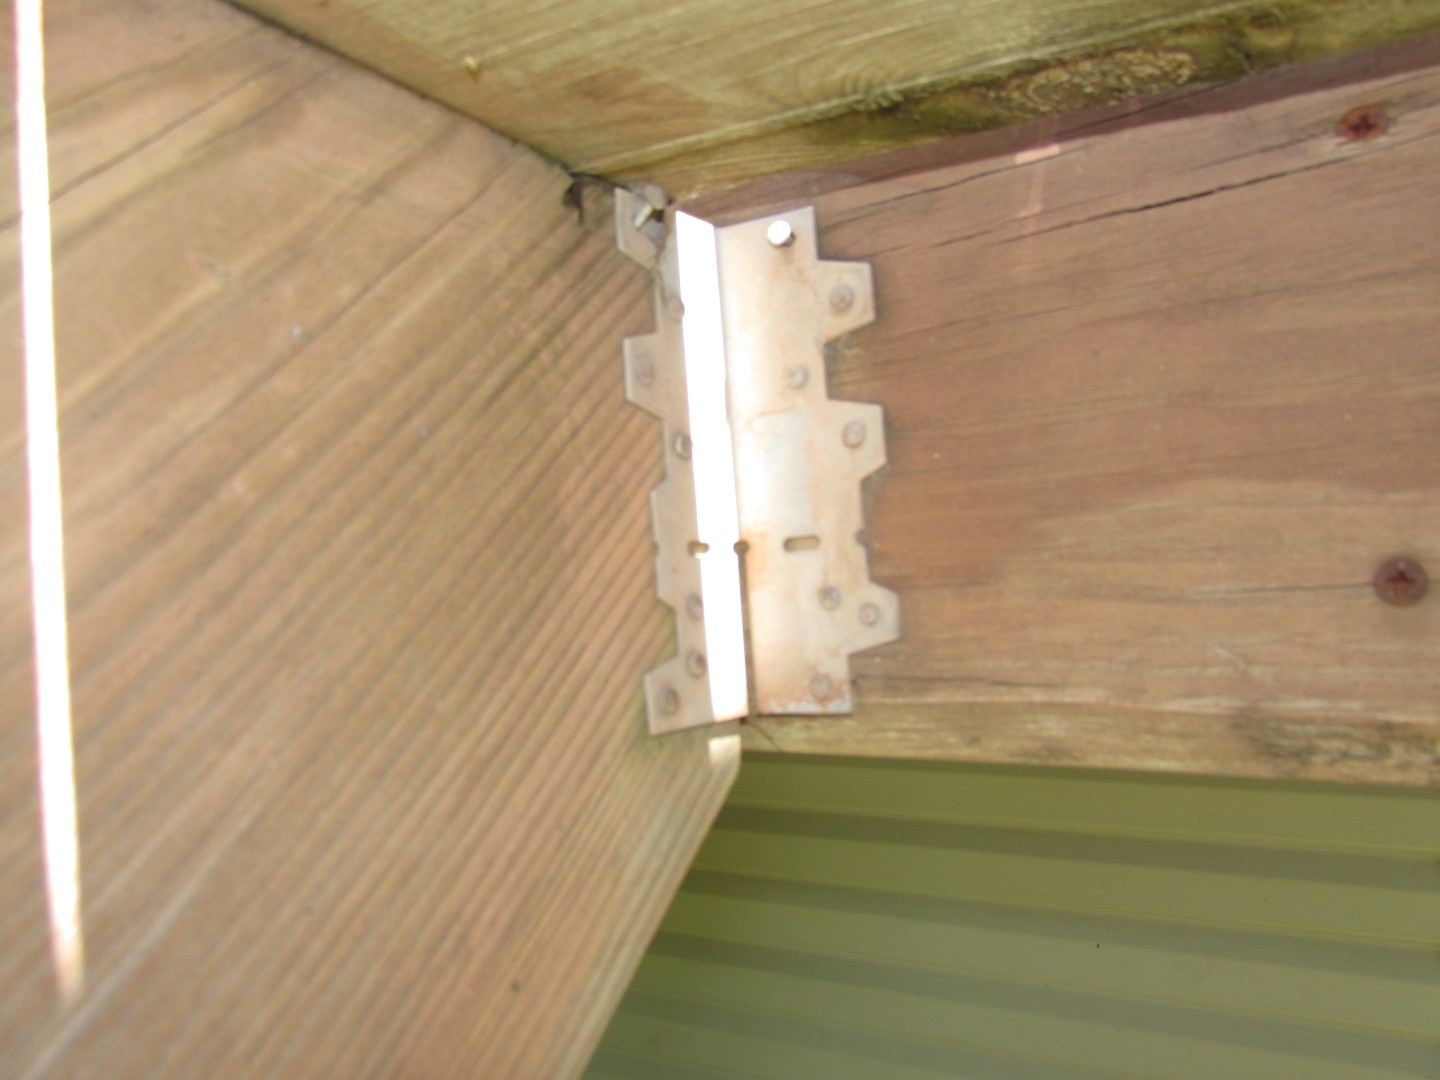
Flashing should always be installed above the top of the ledgerboard, which is the piece of wood that attaches the deck to the house. The purpose of the flashing is to keep water from leaking in behind the deck at the house and causing rot. Here in Minnesota, painted galvanized steel is pretty much the standard way to flash the ledgerboard.
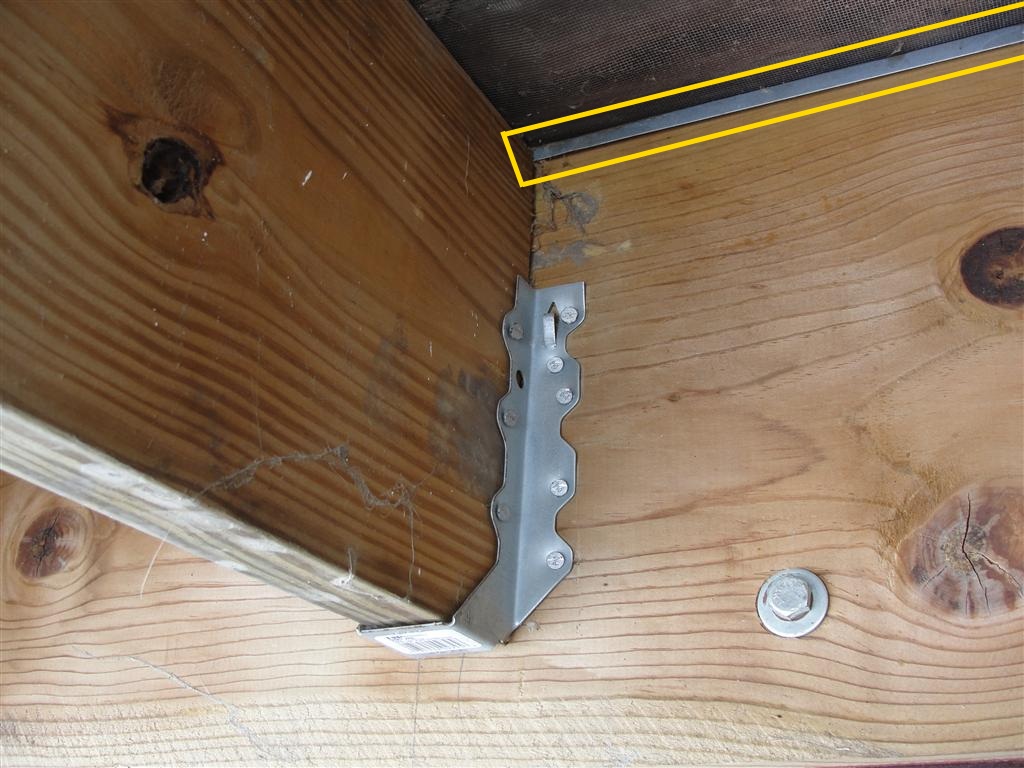
To determine if the ledgerboard is flashed, just take a peek underneath the deck. If you can see a piece of metal sticking out over the edge of the ledgerboard from underneath, you know that flashing is present. This doesn’t mean it was installed properly, but you should at least feel a little bit better knowing it’s there. If installed properly, this flashing will extend up underneath the siding. The photo below shows what you might see if the flashing is properly installed:
If there is no flashing present, there will be a much higher potential for water intrusion and rot, which can severely weaken the connection from the deck to the house.
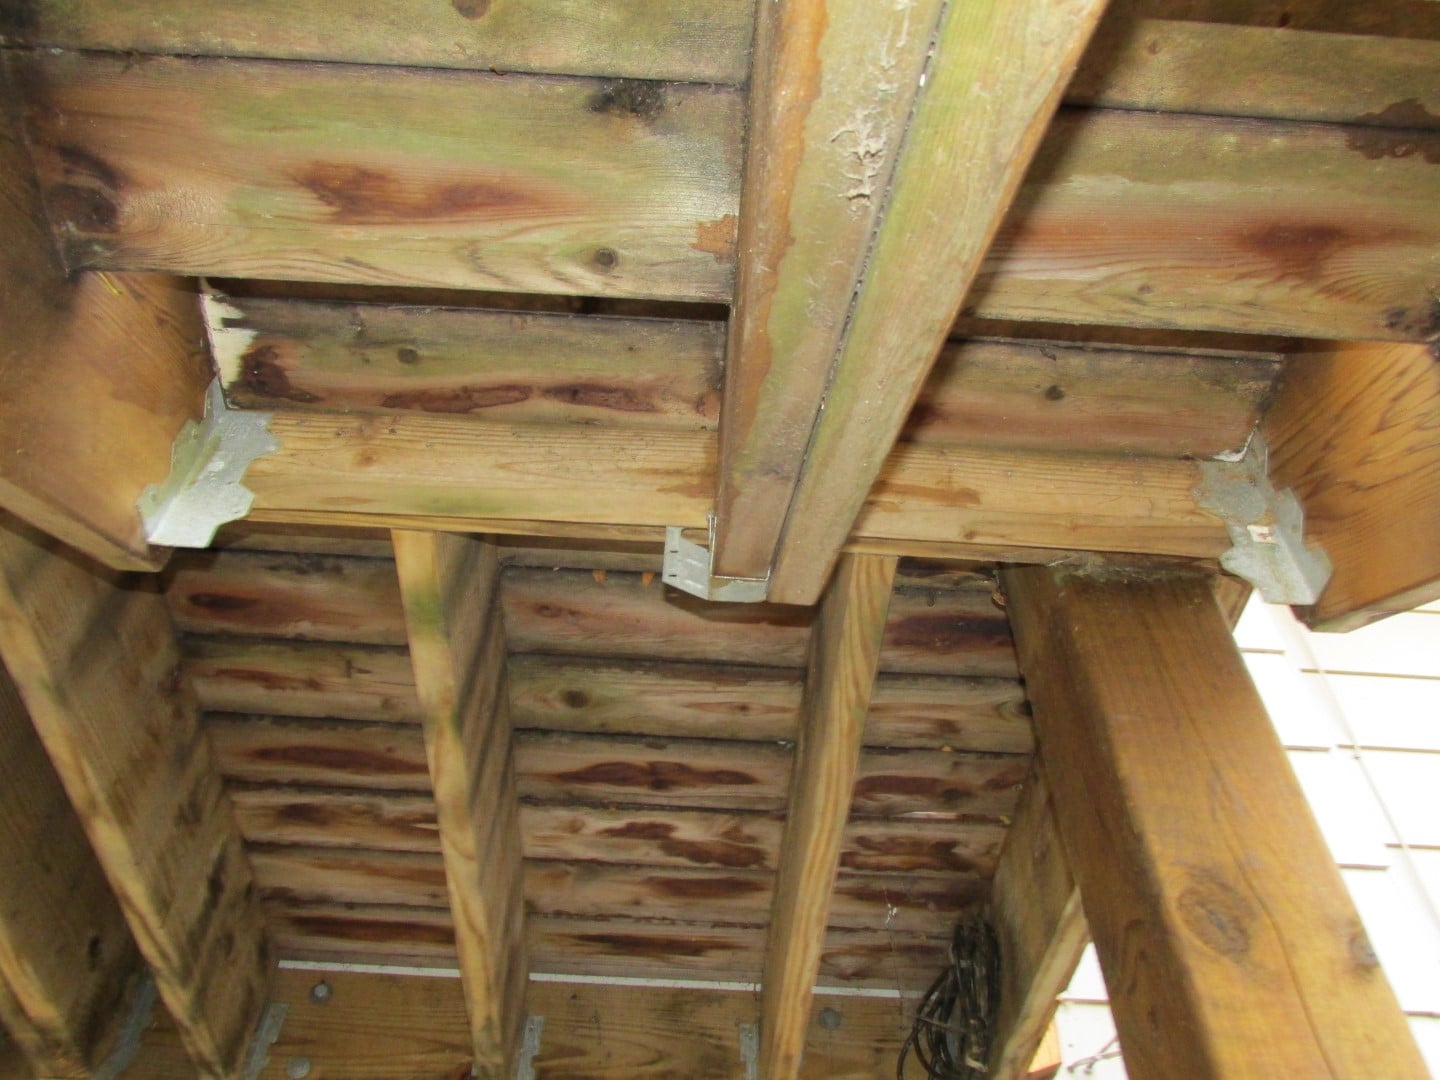
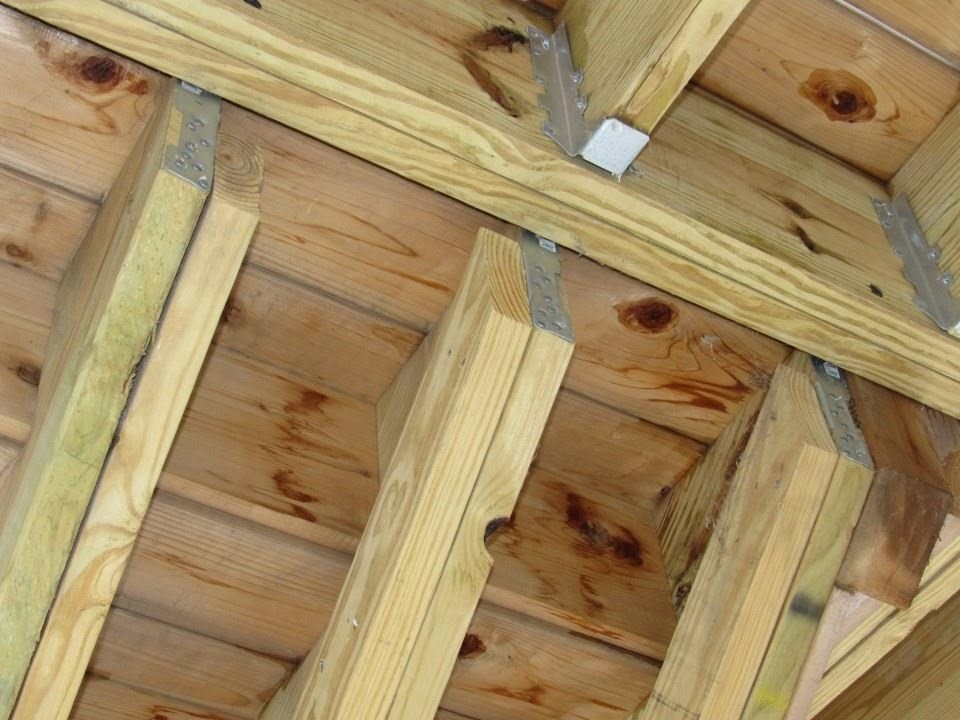
Improper joist hanger installation
Joist hangers are metal brackets that attach deck joists to the ledgerboard.
Manufacturers of joist hangers are very specific about how joist hangers should be installed; they specify exactly which nails should be installed and exactly how much weight the joist hangers will support when installed properly. Here are a few defects that we regularly find with joist hangers:
- Missing nails. Nails are supposed to be installed in every hole.
- Improper joist hanger nails. If you can see a little “10” on the head of the nail, it’s probably the wrong nail. Click the following link for more details on this defect: improper joist hanger nails.
- Screws used instead of nails. Screws don’t have nearly the shear strength of nails, and they’re not an acceptable substitute unless they’re Joist hanger screws.
- Altered joist hangers. Joist hangers shouldn’t be bent or cut.
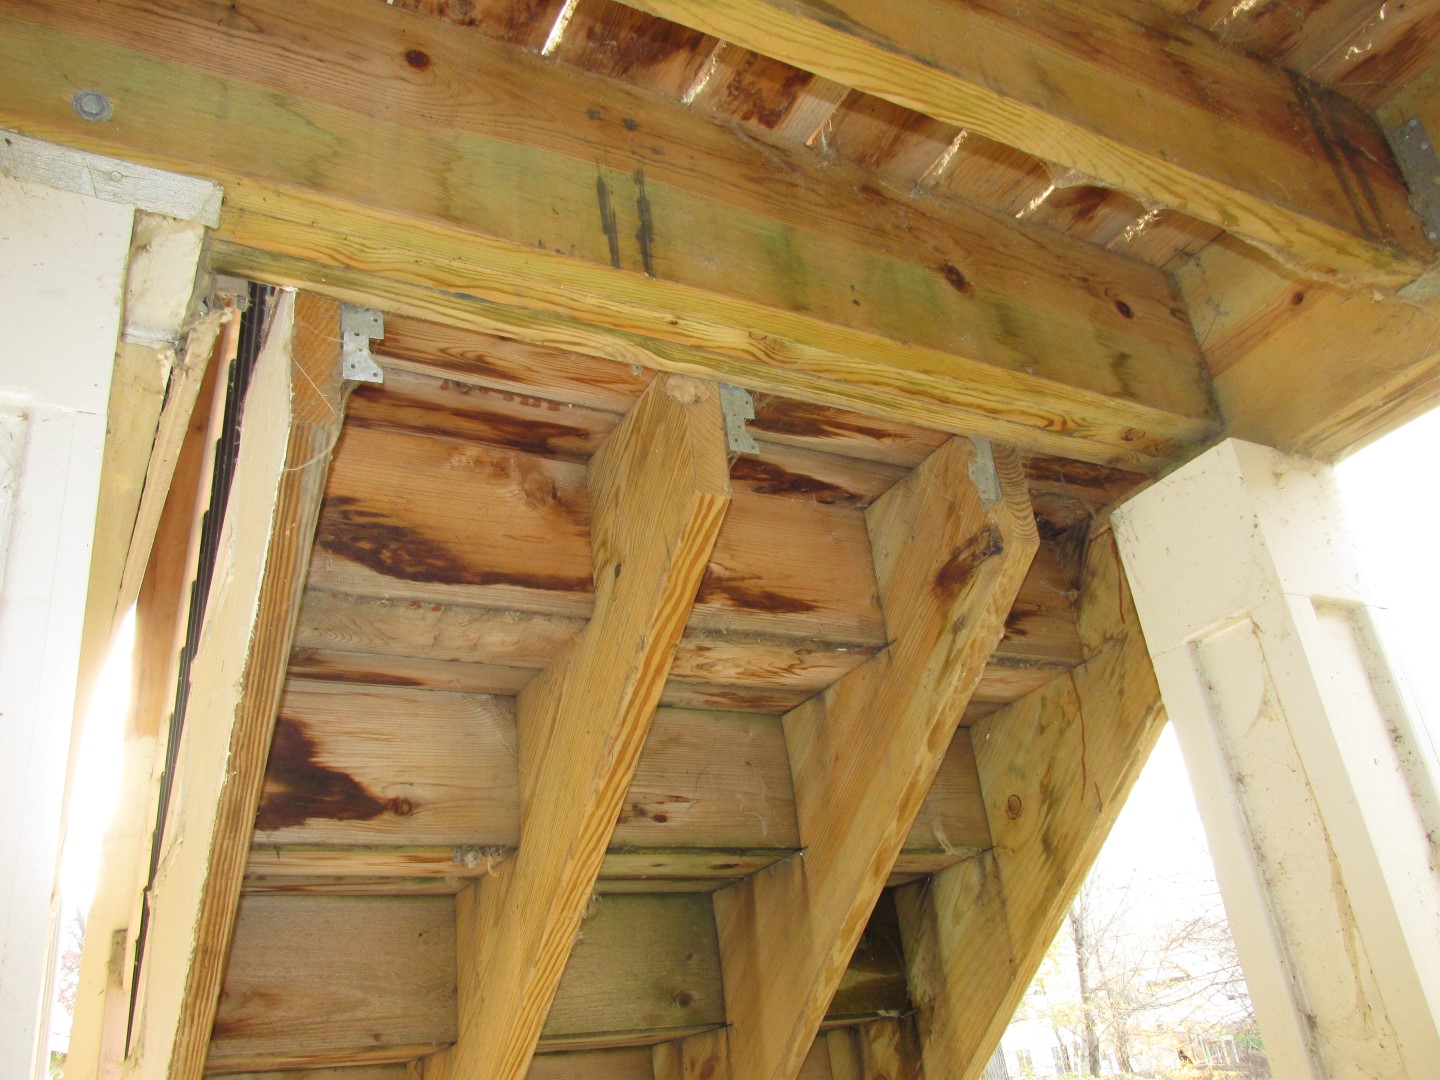
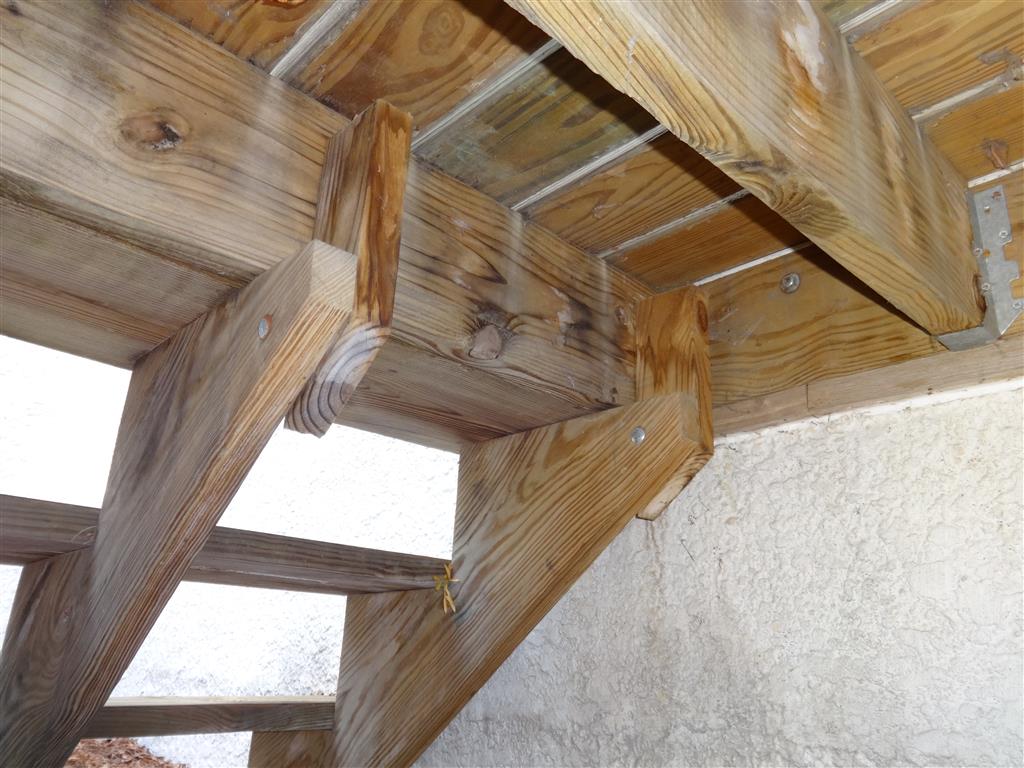
Rot
Get a screwdriver and poke around your deck, looking for rot. The area that usually rots first is the place where two deck boards butt up against each other over a joist. Pay special attention to that location. You should also pay close attention to places where 4×4 guardrail posts meet the rest of the framing. These areas don’t dry out well and tend to rot first. Also, if your deck doesn’t have the aforementioned ledgerboard flashing, you should carefully inspect the place where the deck connects to the house. And, of course, inspect the joists, posts, and beams, too. Those are the “bones” of your deck.


Guardrail problems
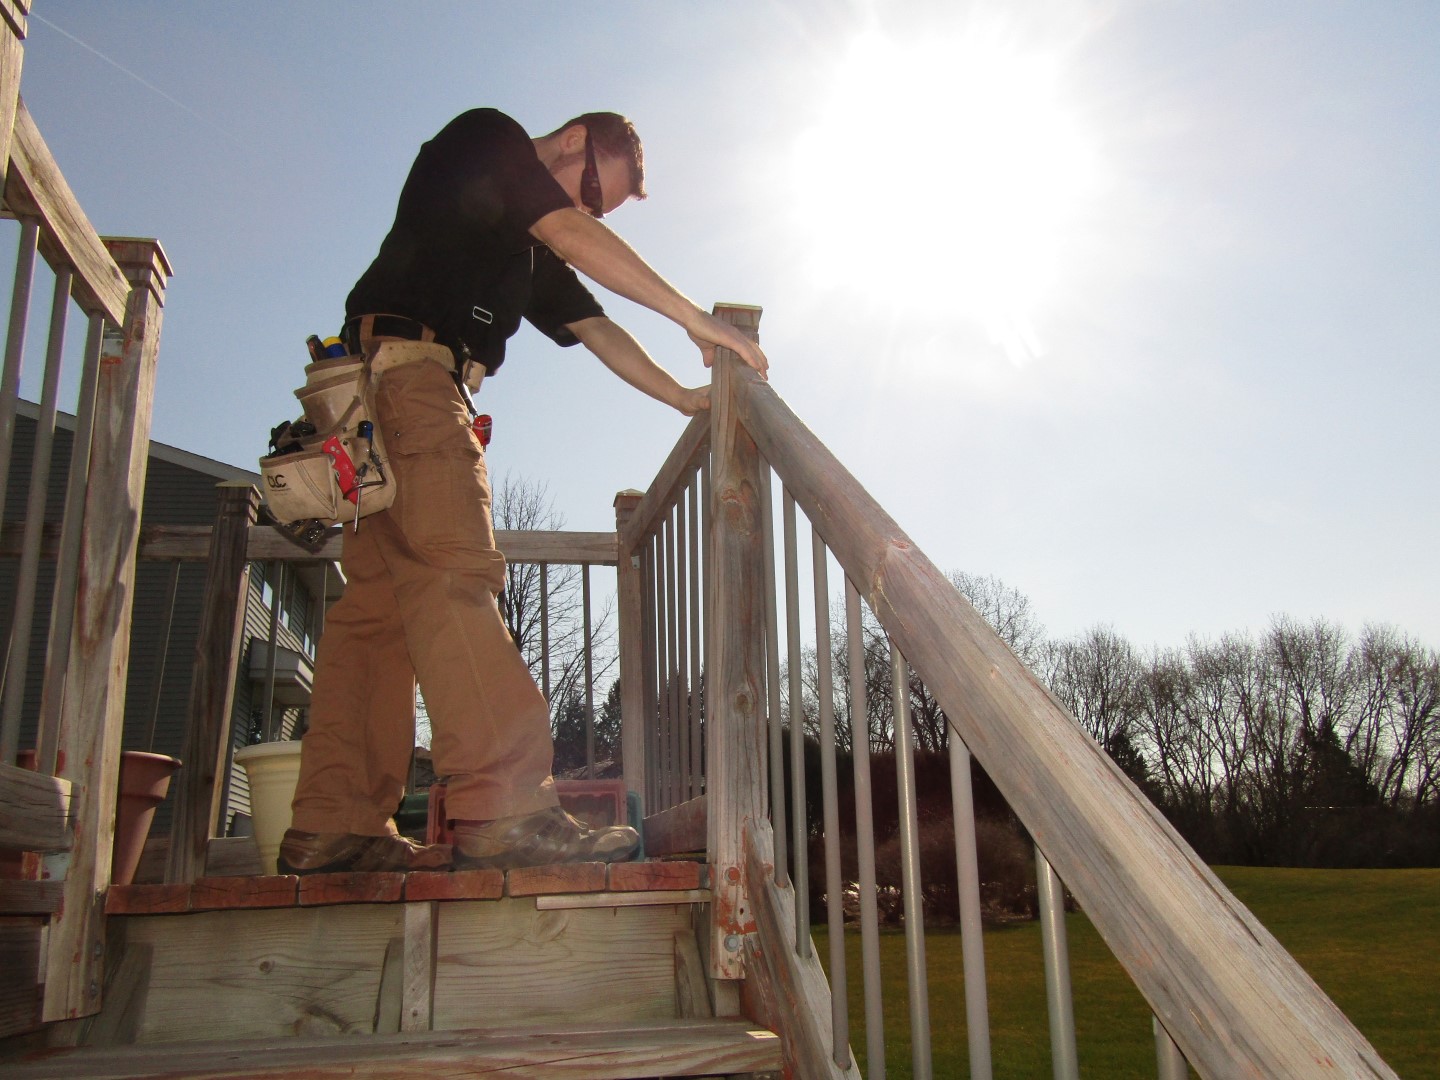
Guardrails should be strong. If you can push on the top of your guardrail and it moves a couple of inches, it’s not strong enough; guardrails should be able to withstand 200 lbs of pressure along the top rail in any direction.
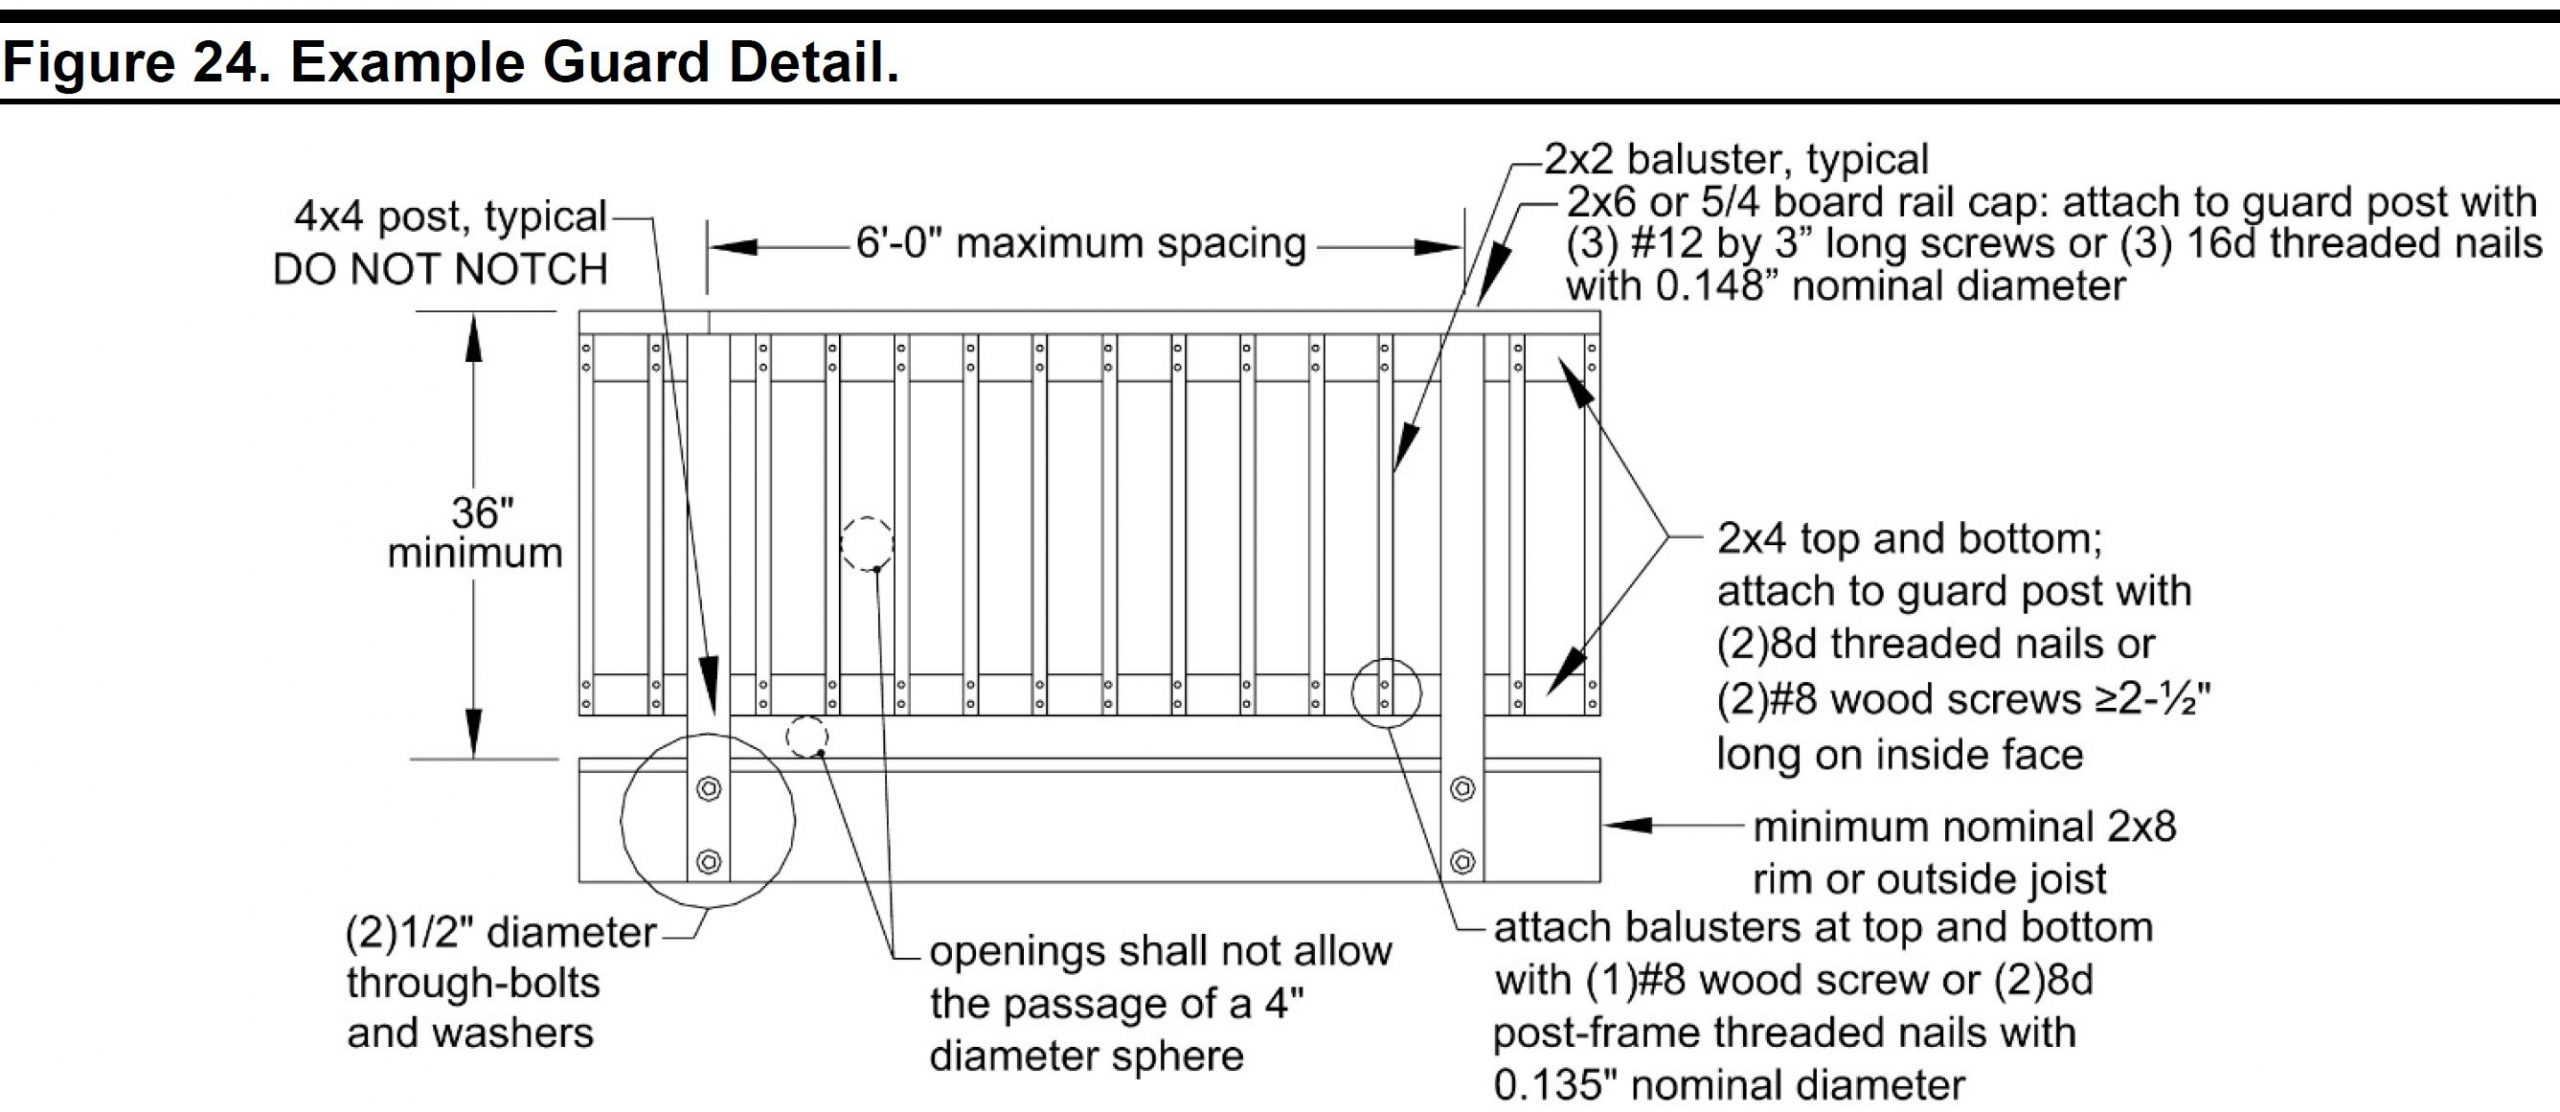
While this may seem like a lot, just think about a group of people leaning against a guardrail during a large gathering. If a guardrail is supported with only 2×2 balusters, it’s too weak and should be reinforced. The current standard is to have 4×4 posts installed at least every 6′, and they shouldn’t be notched at the bottom. The diagram below from DCA-6 shows how to do it right.
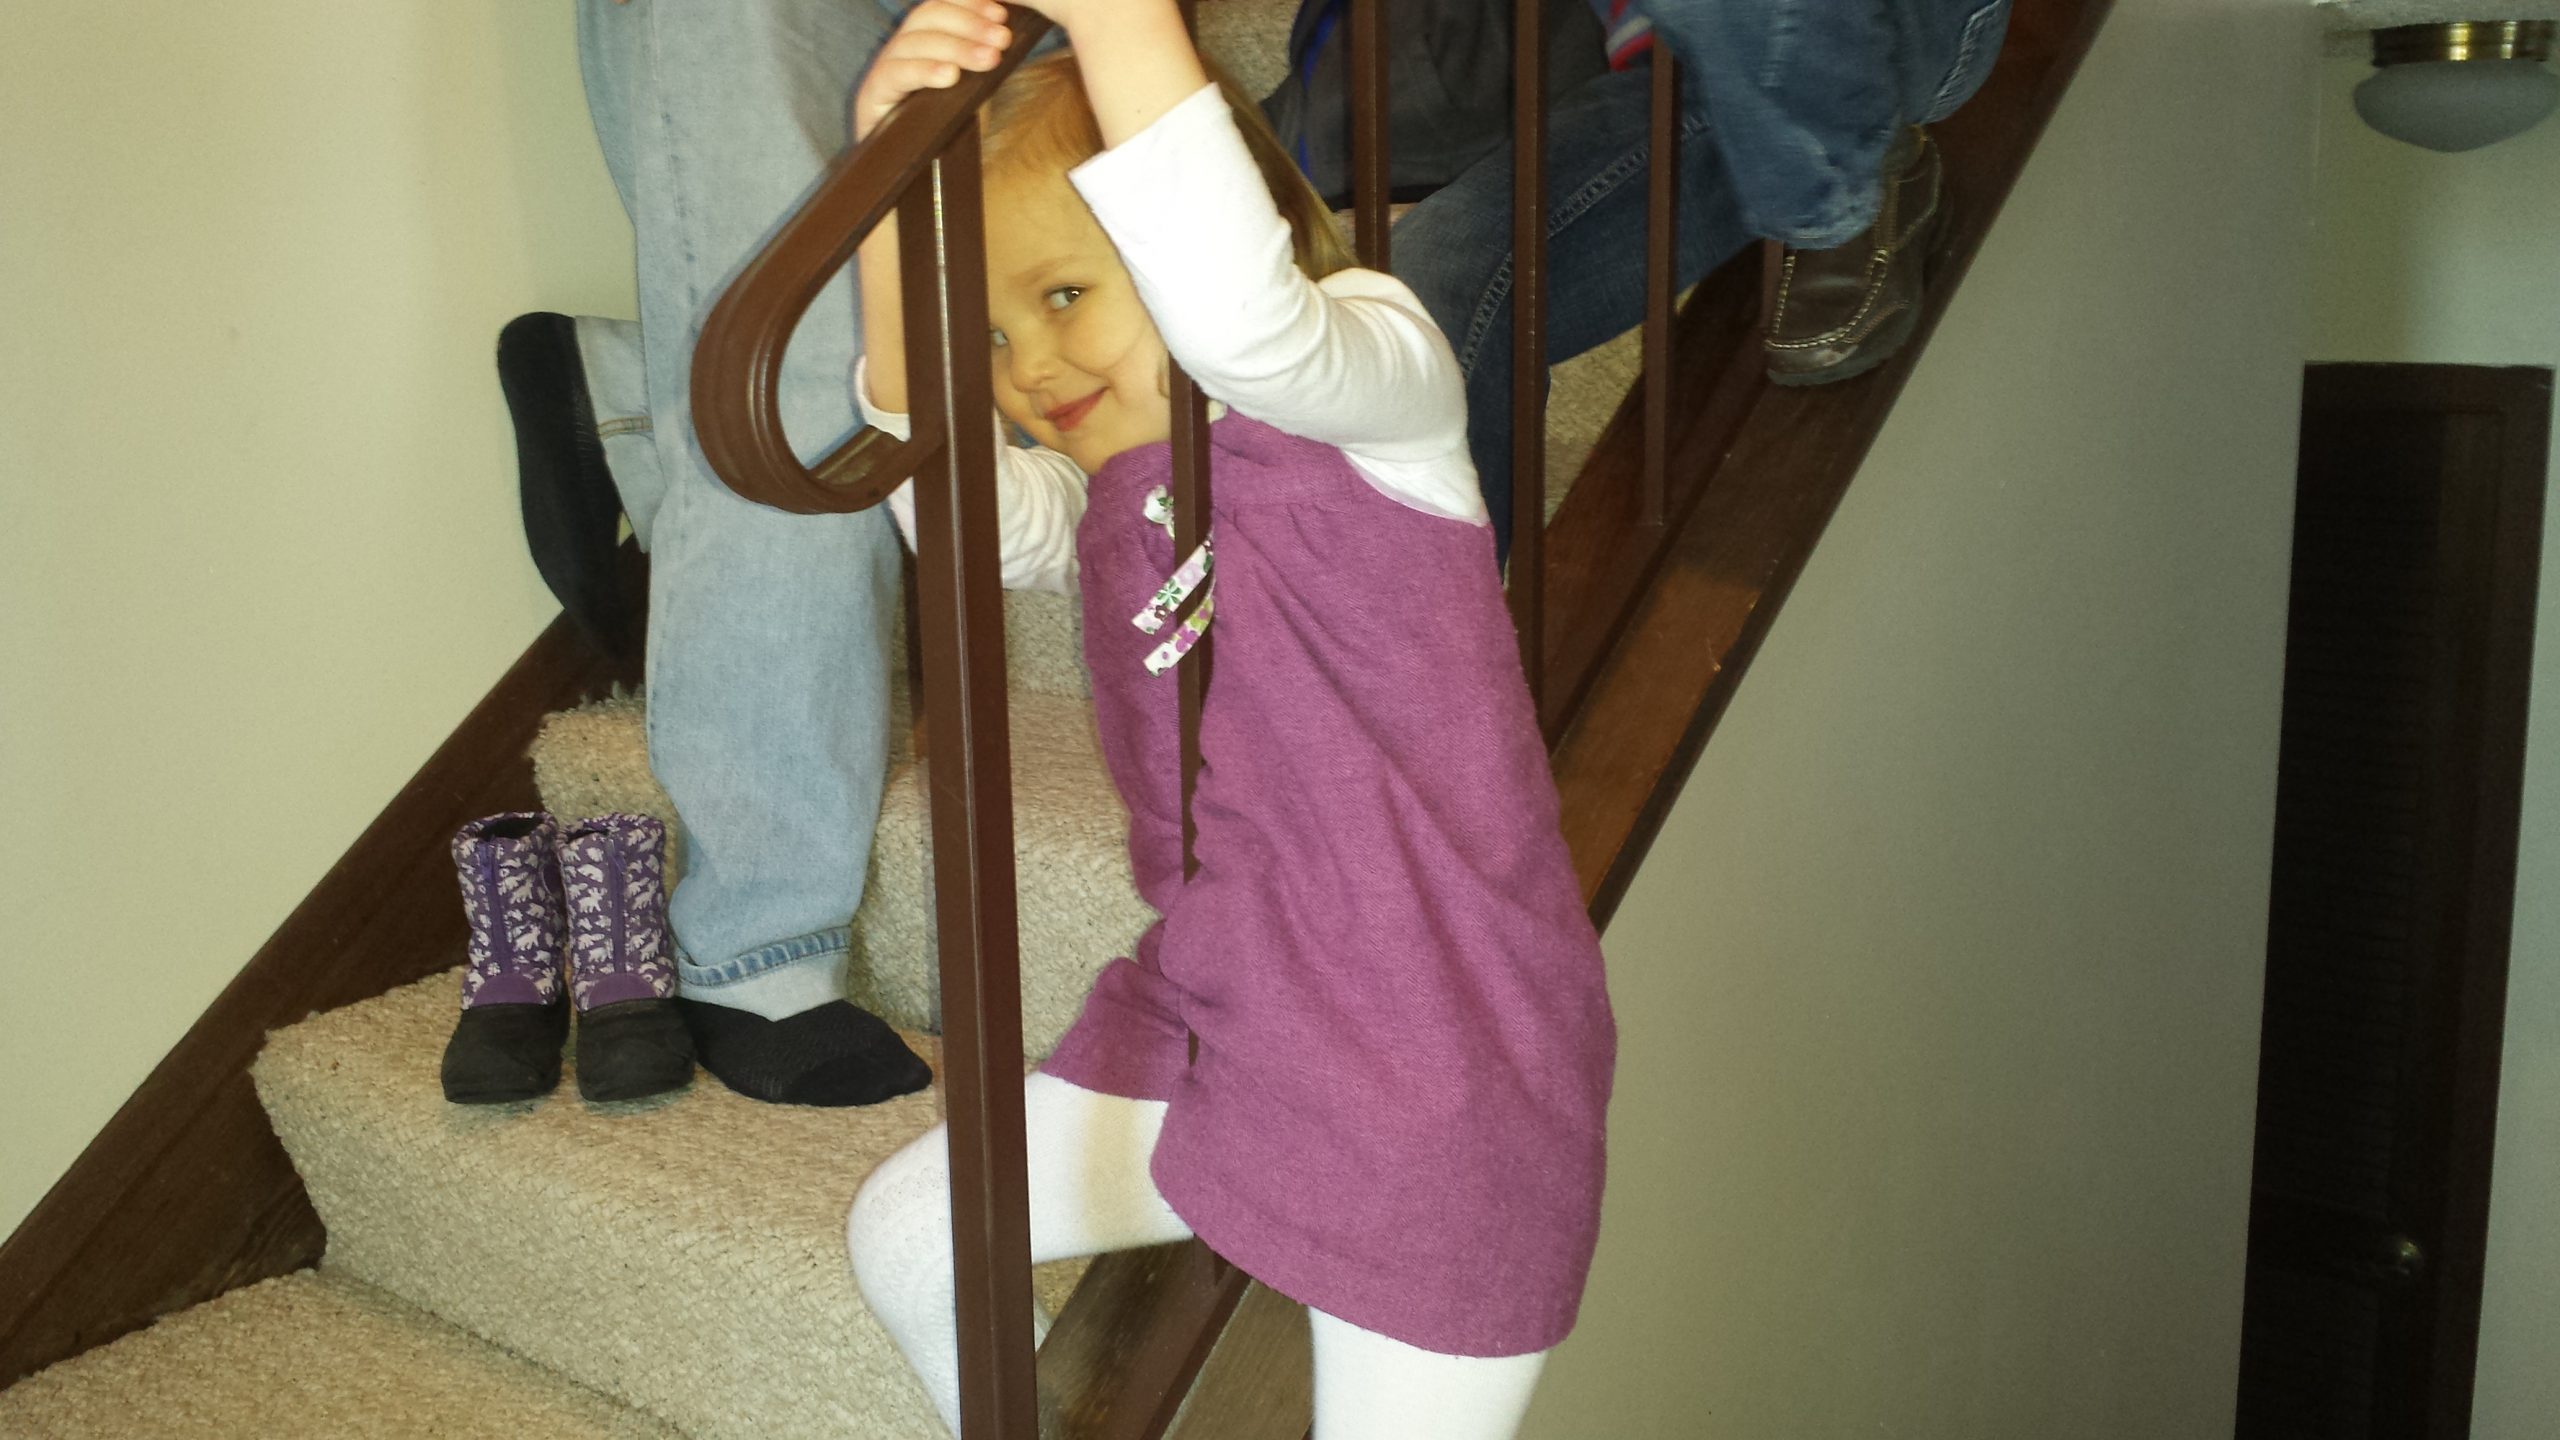
Also, the current requirement for guardrails is to space the balusters so a 4″ sphere can’t pass through. This is a child safety requirement; young kids can slip their bodies through fairly small openings, but their heads might not make it through. Scary, right?
If you have small children, you might also want to avoid horizontal in-fill, such as steel cables that little kids can climb like a ladder, but there’s nothing in the building code that prohibits this design. See guards that make a ladder for details on this.
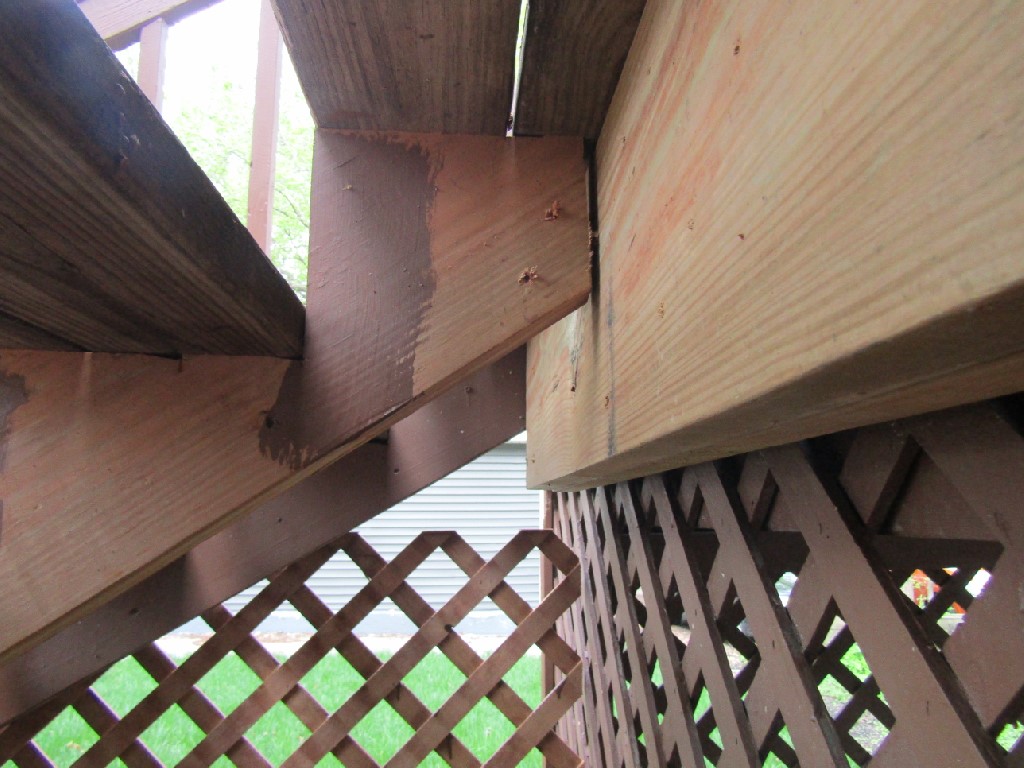
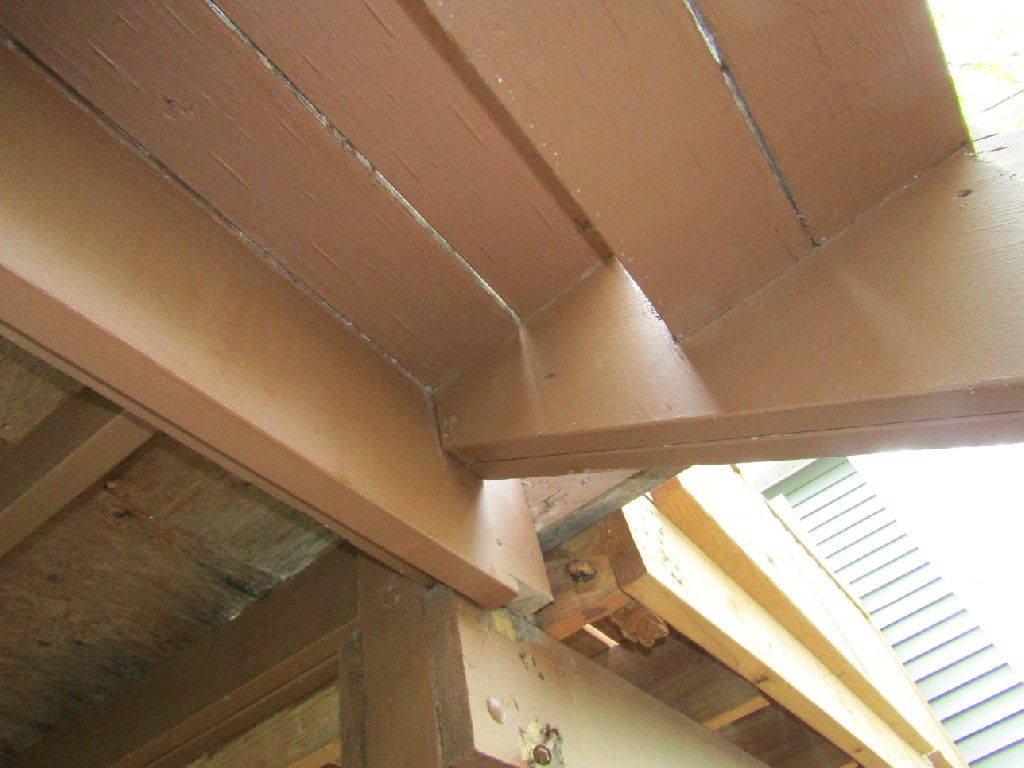
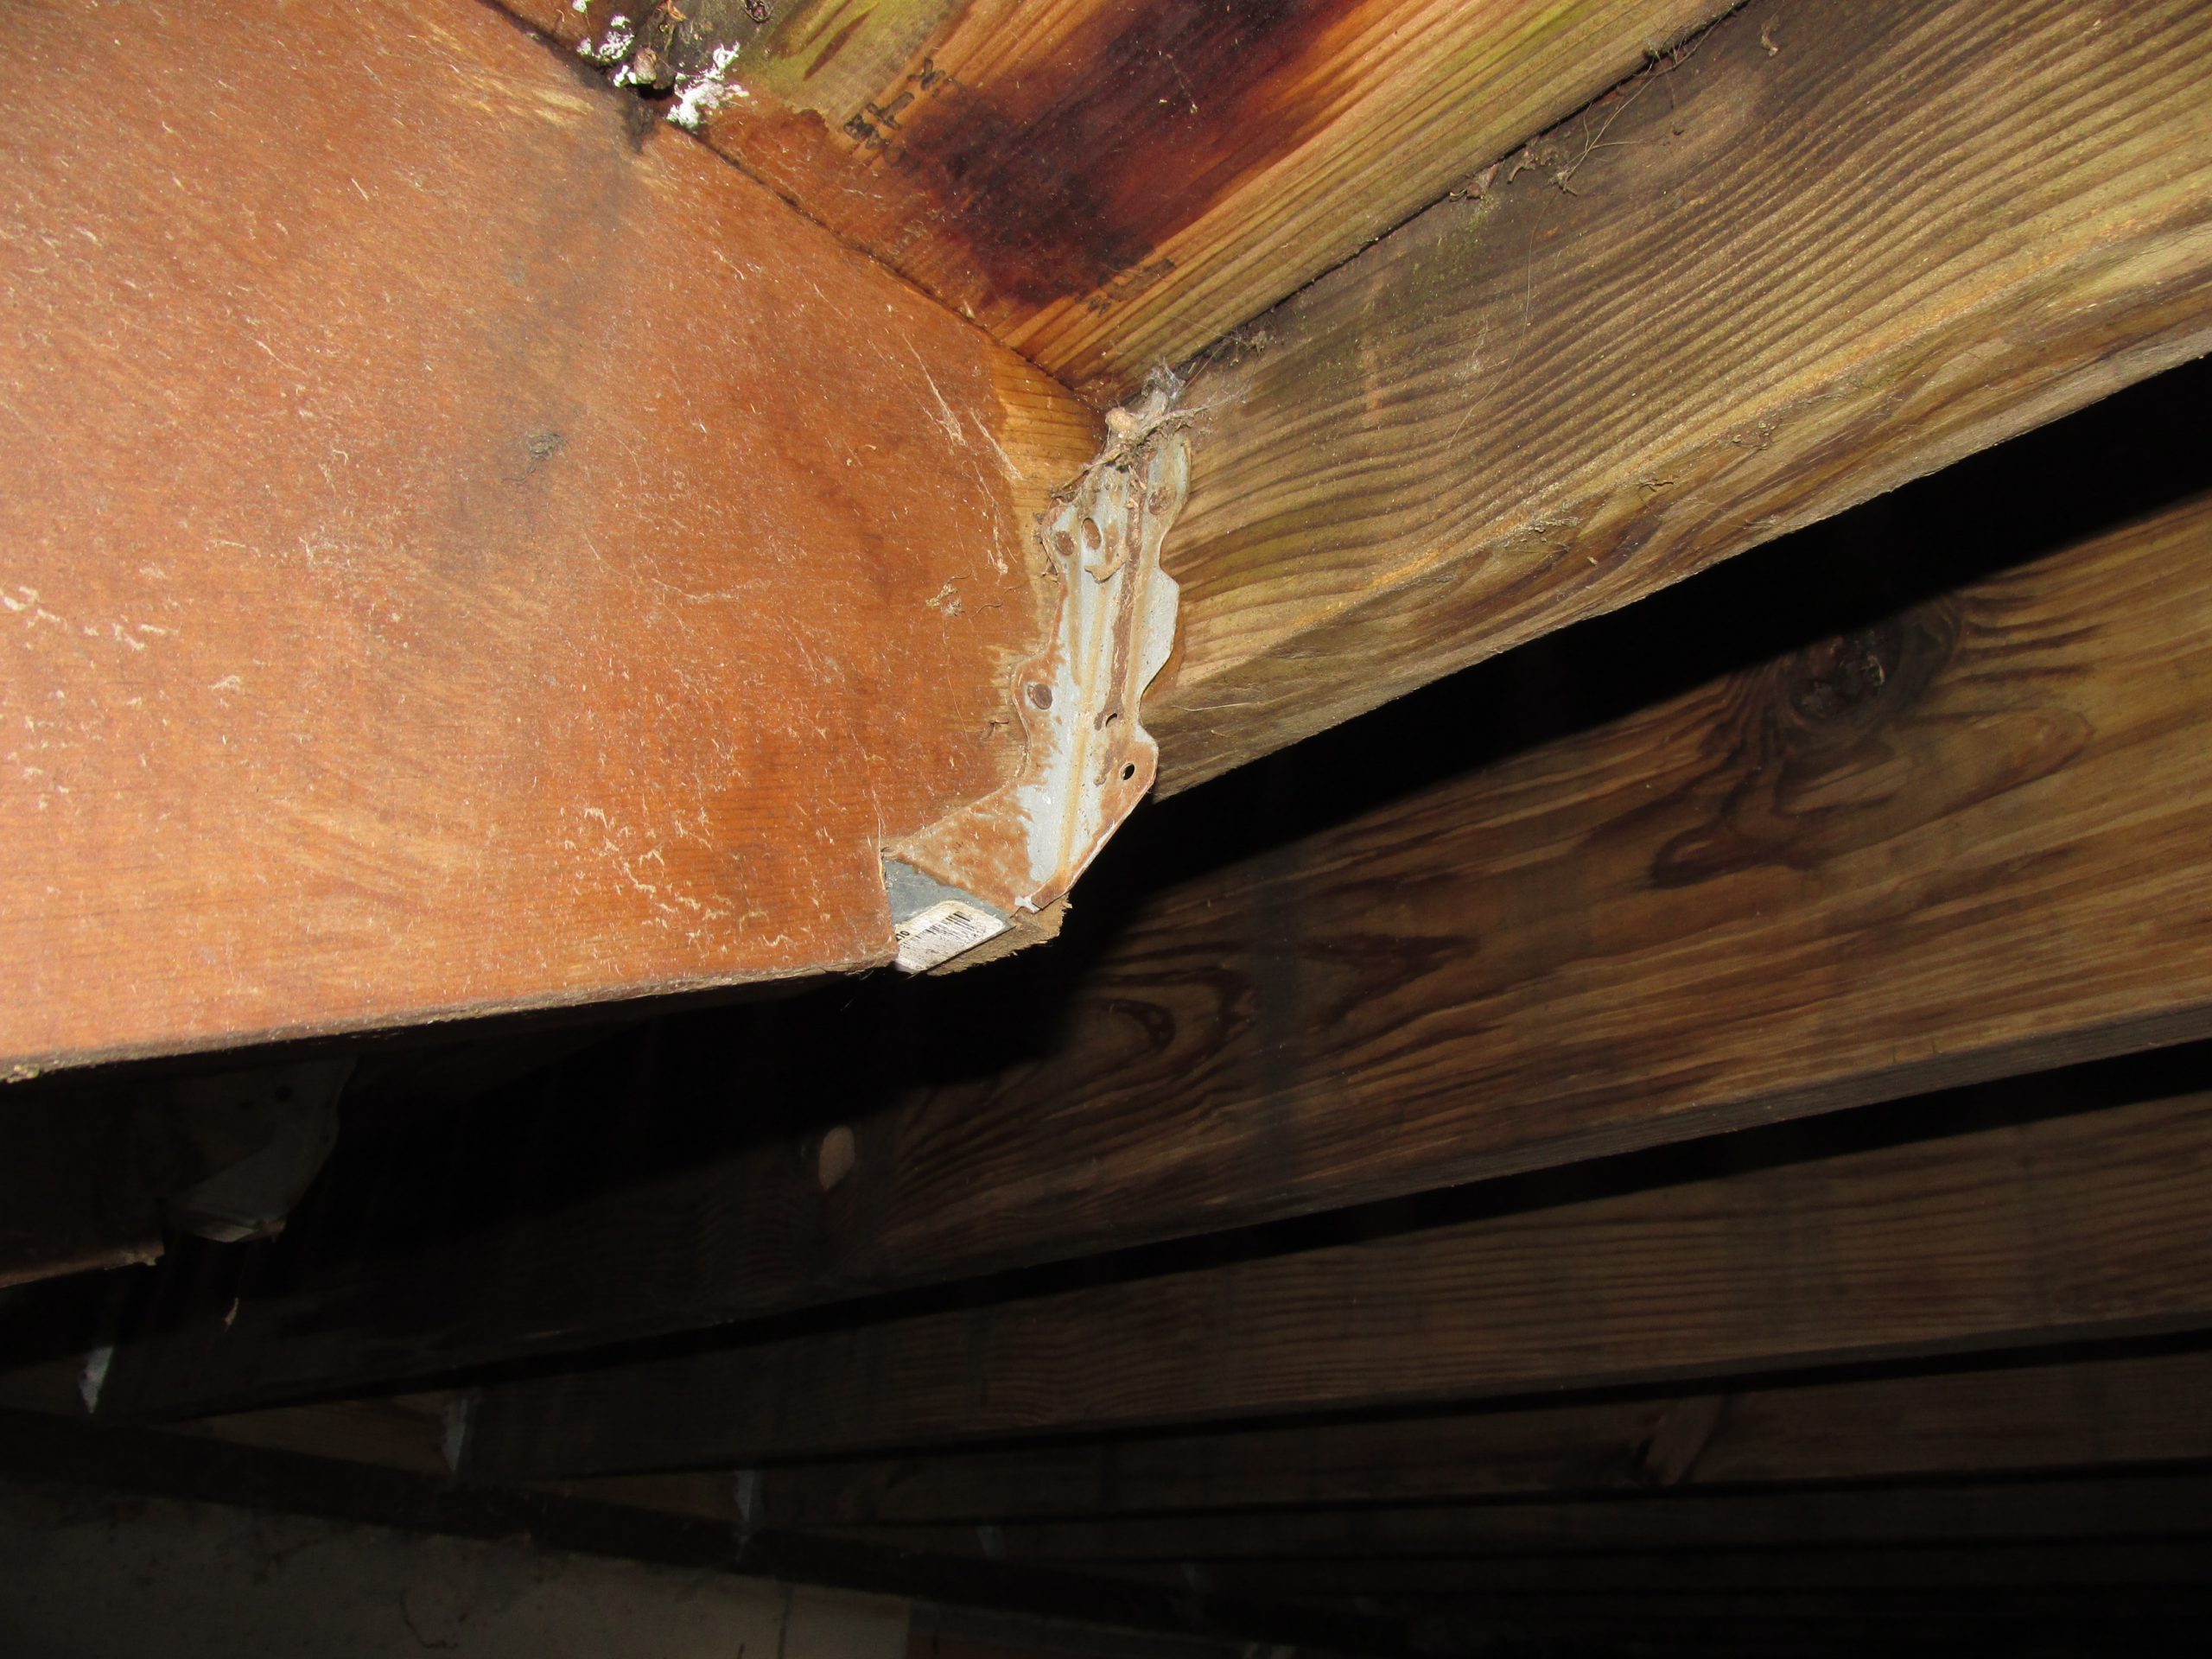
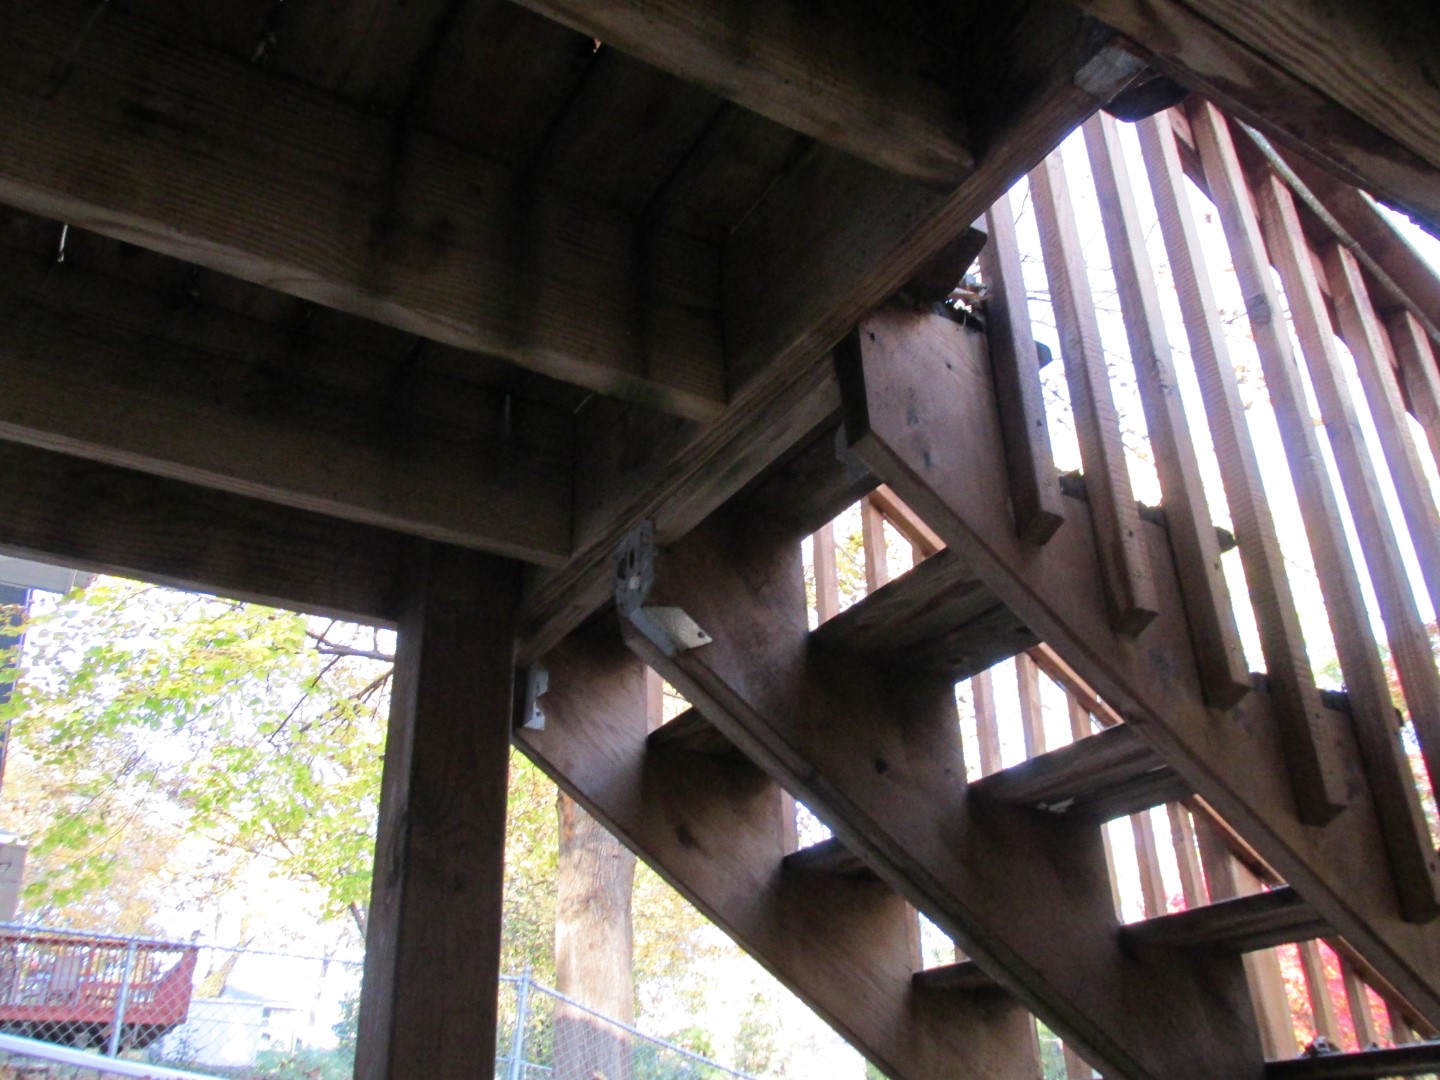
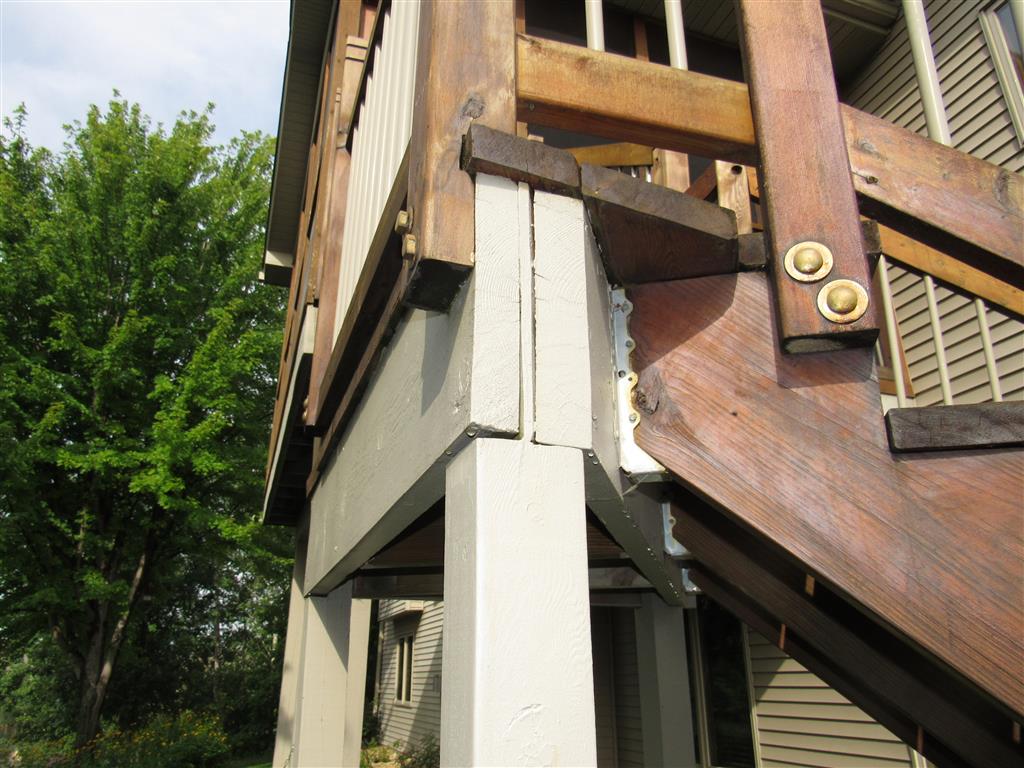
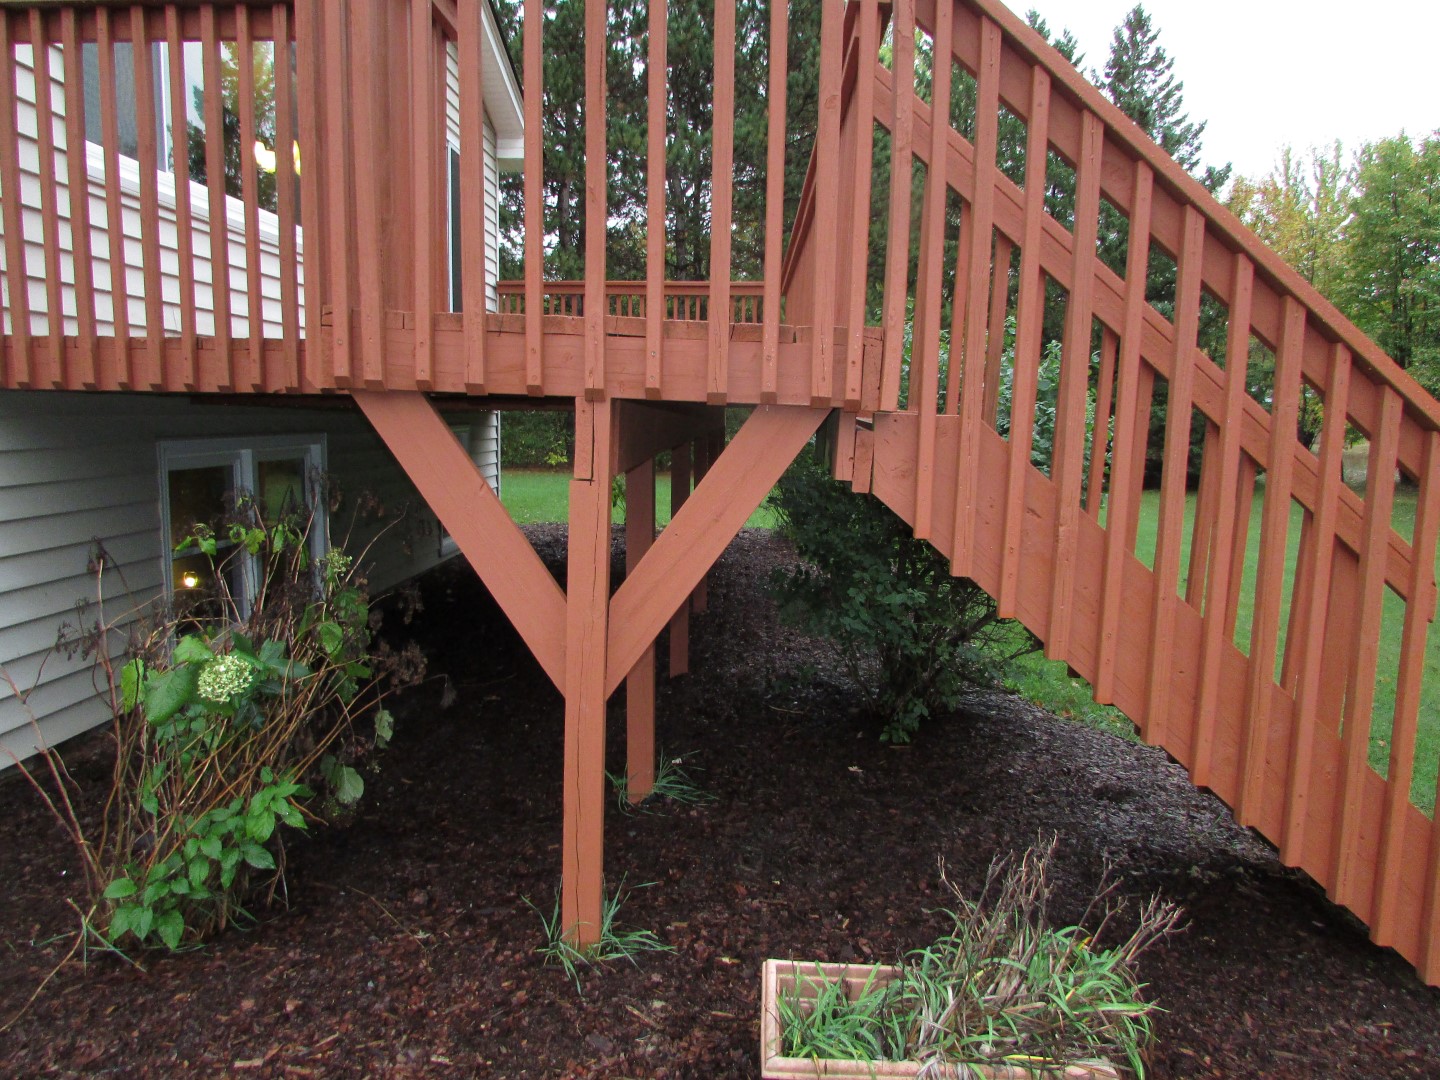
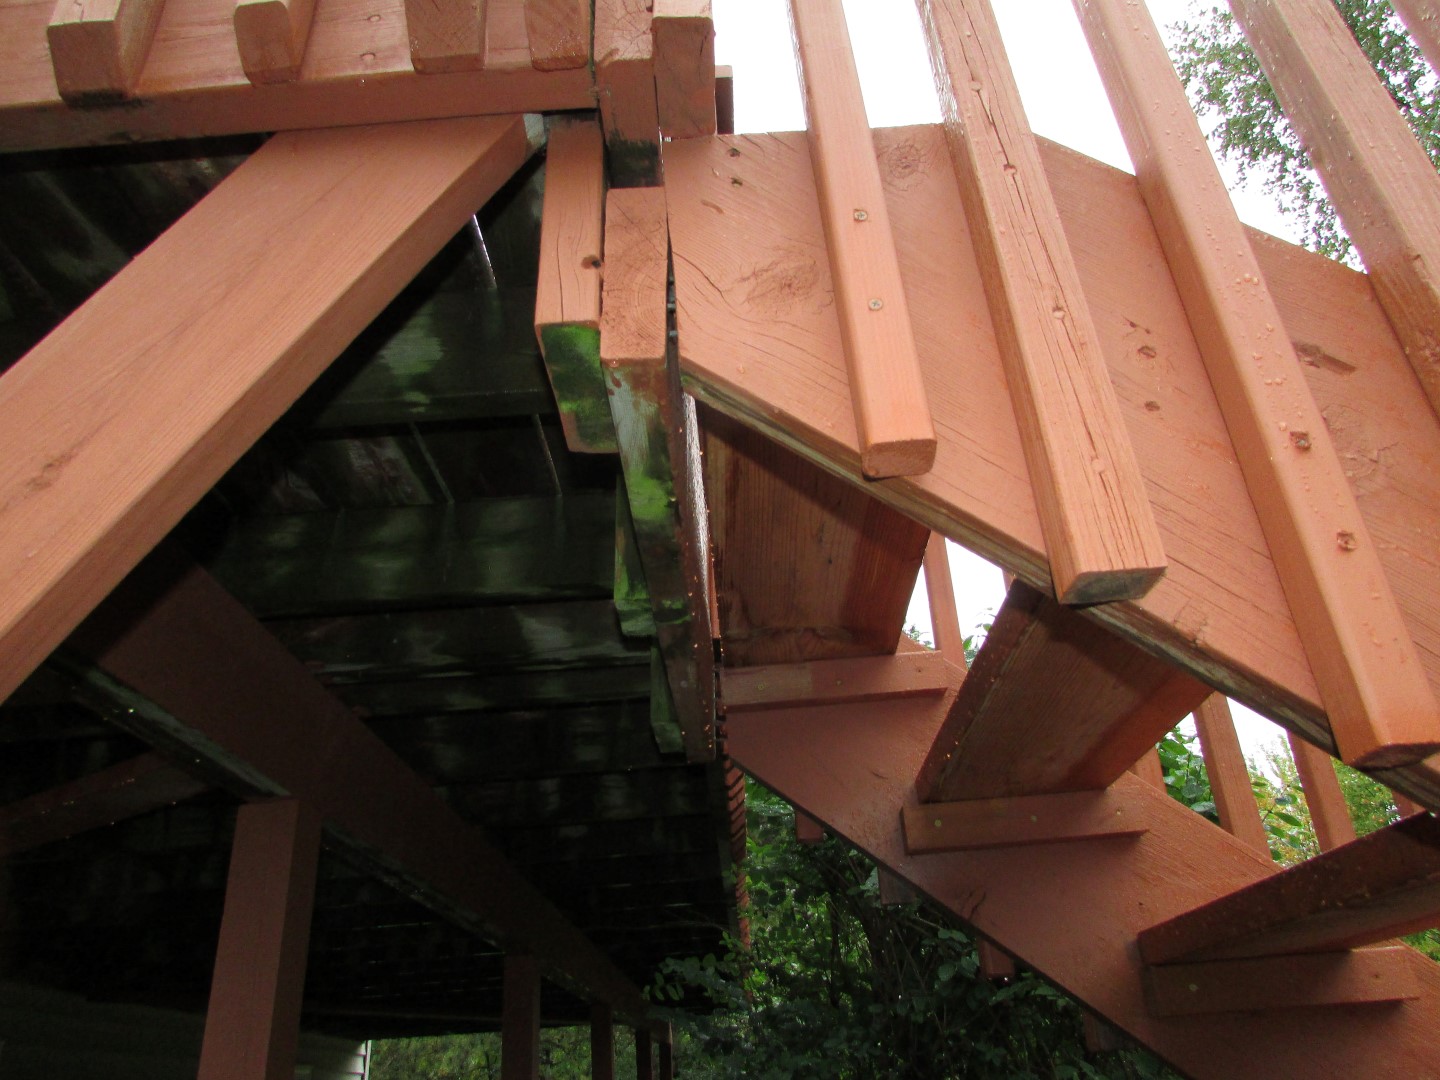
Improper stairway attachment
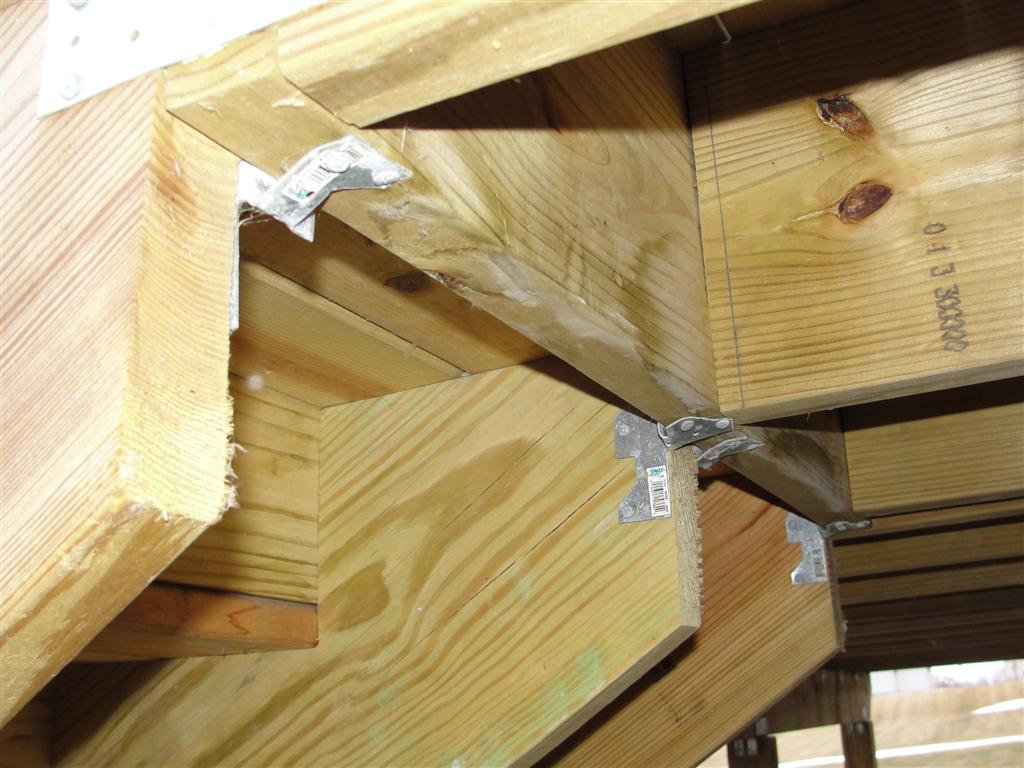
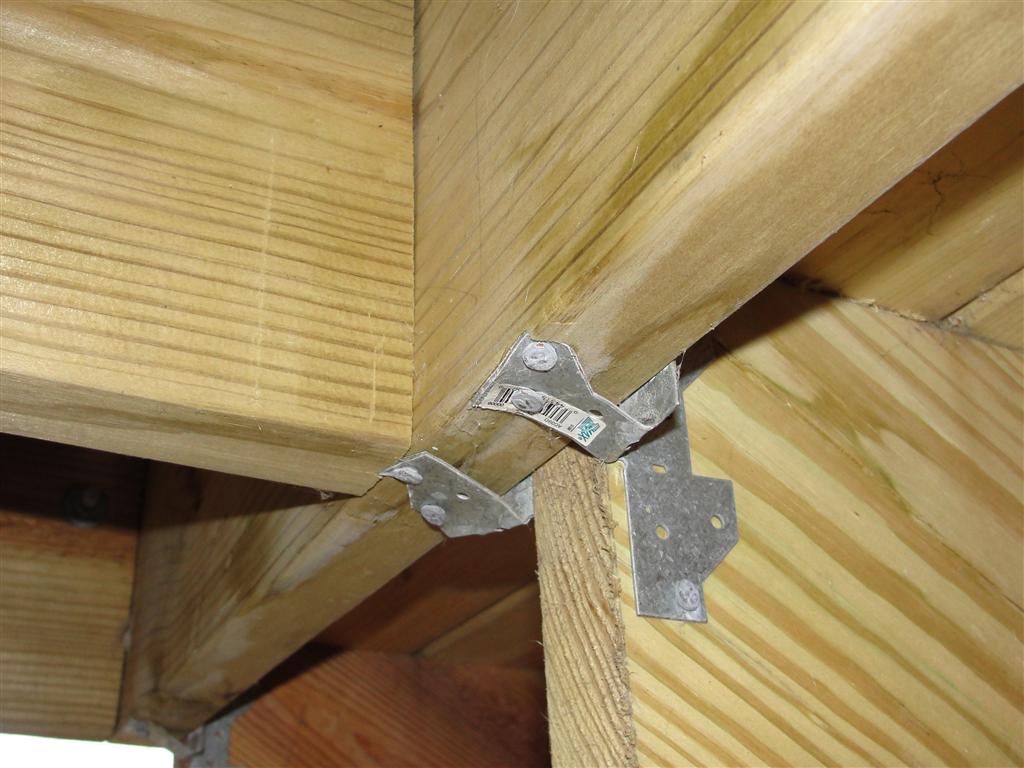
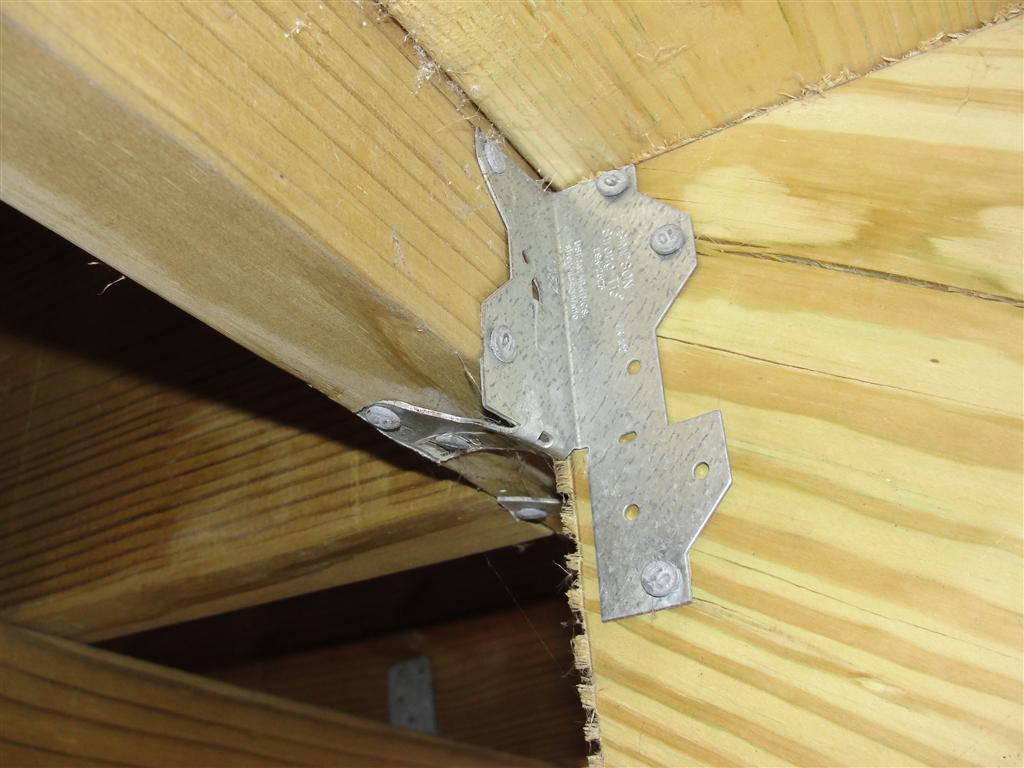
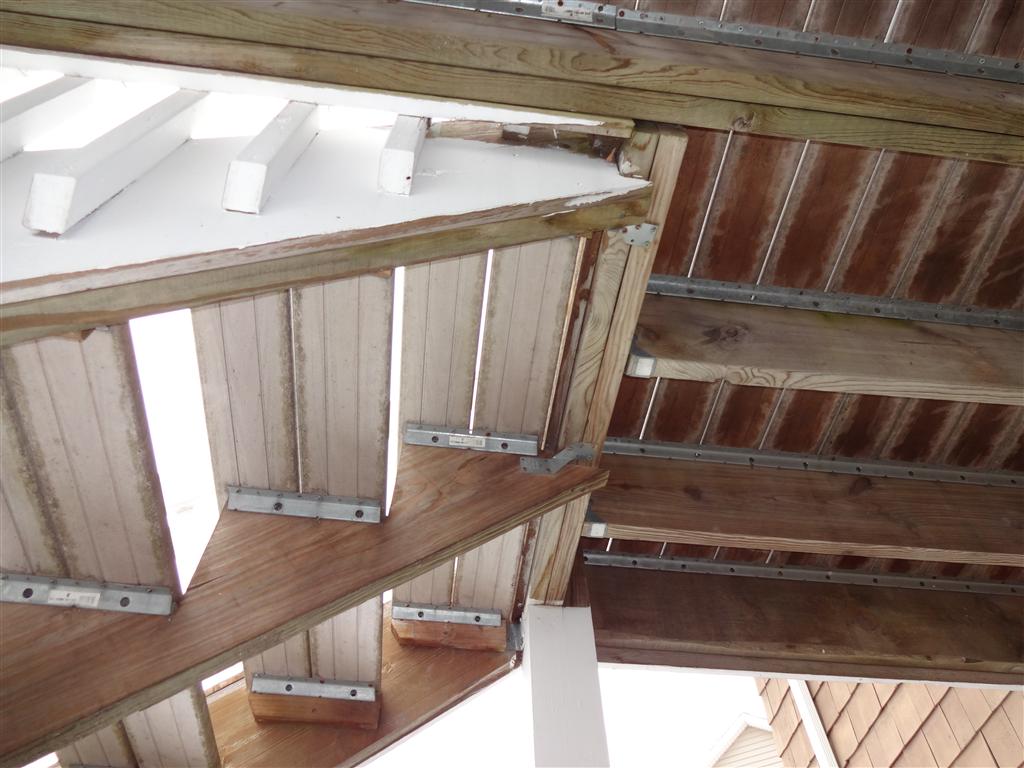
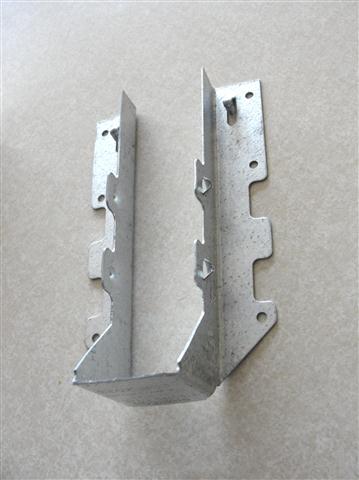
The best way to attach a stairway stringer to a deck is to use a metal bracket that’s designed just for this purpose. The photo below shows a proper bracket for a stairway stringer.
And the diagram below shows how it’s supposed to be installed.
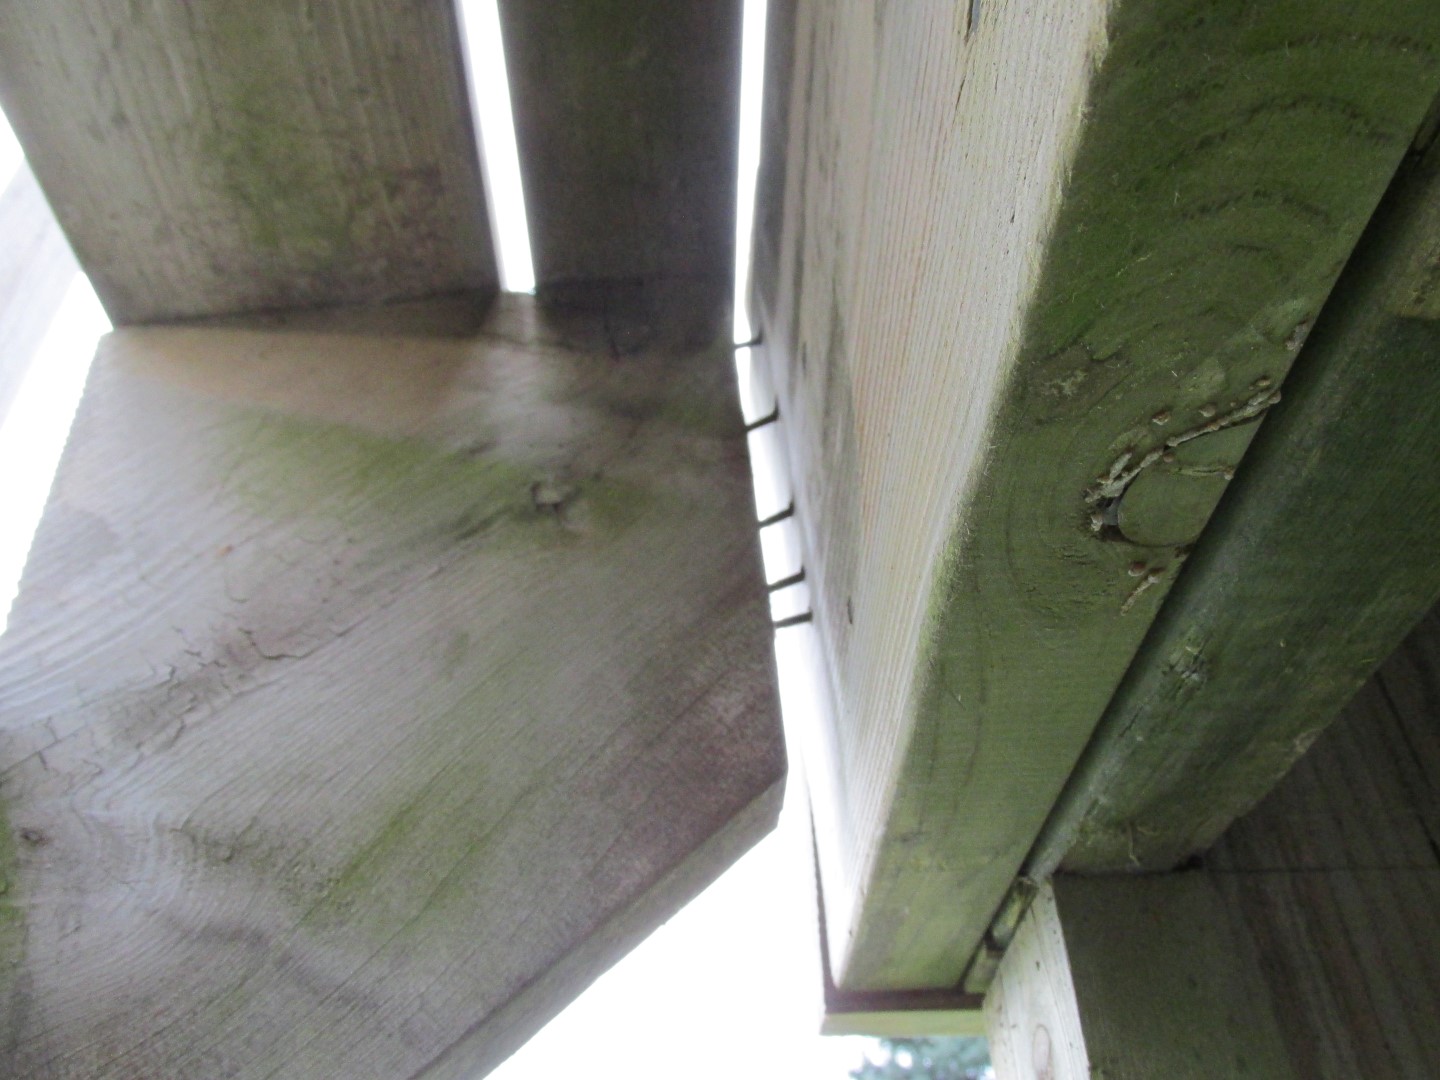
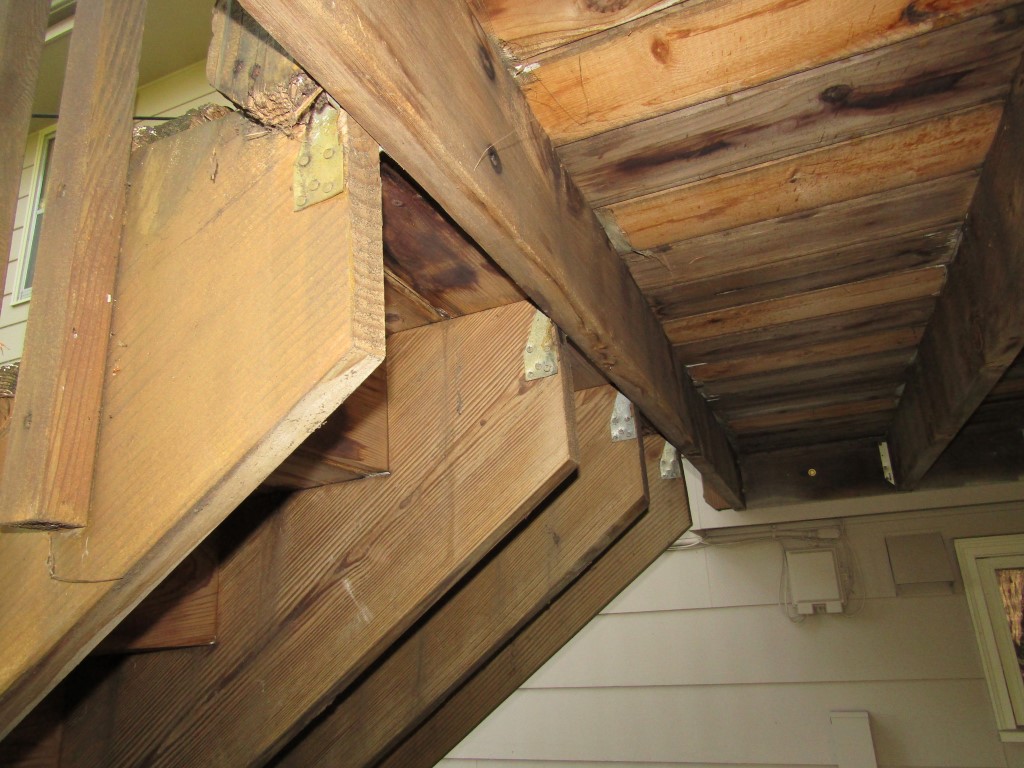
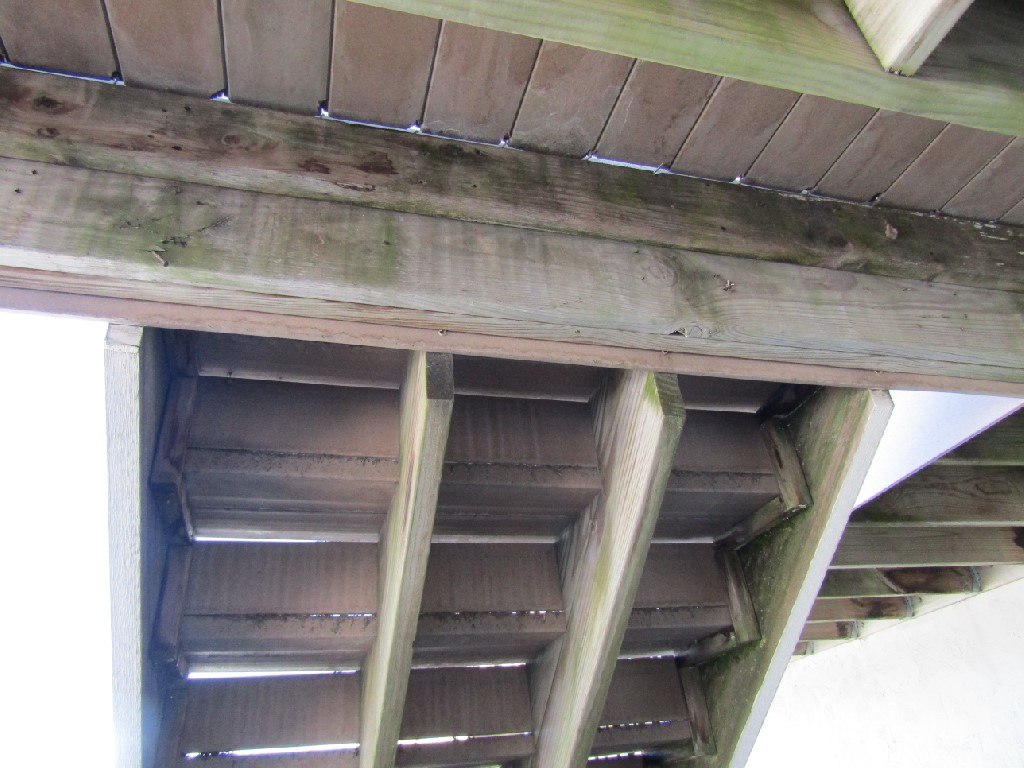
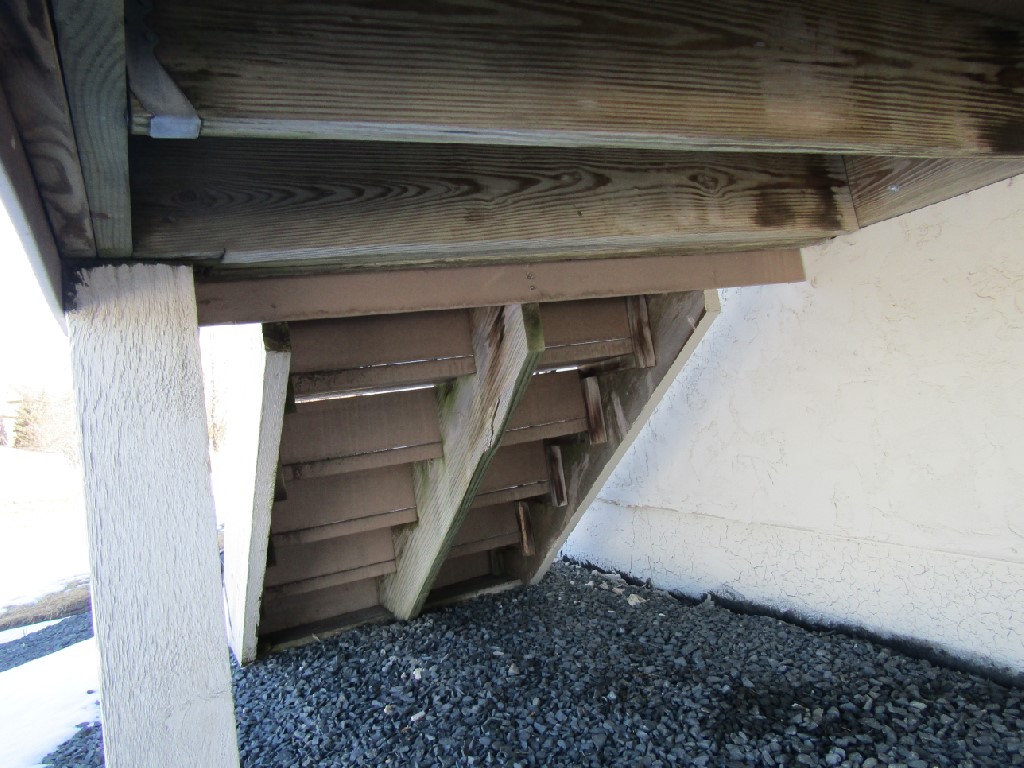
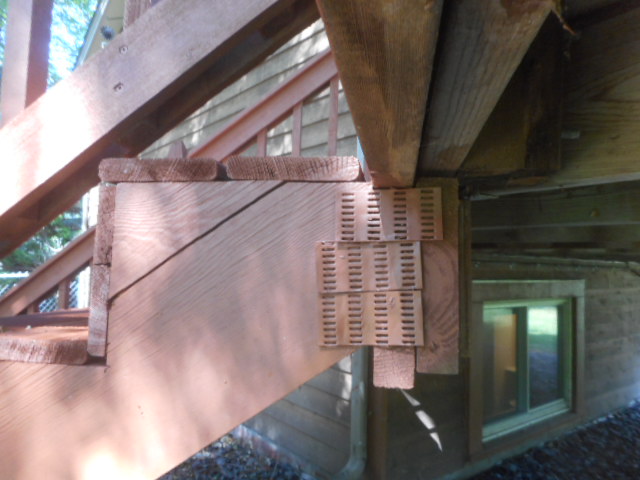
But the photo below shows how it’s not supposed to be installed:
This bracket isn’t the only way to properly attach a stairway stringer, but it’s probably the best way. Unfortunately, codebooks are mum on the way to properly attach a stairway to a deck. That makes up my list of the most common deck defects that you can look for yourself. This isn’t a comprehensive list, but it’s a great starting point. Oh, and if you’d like to see many more ways to not attach a deck stairway, check out the gallery below, just for fun.