Repairing a door that doesn’t latch properly might seem like a quick and easy door repair, and it can be, but there are a few little tricks that make the job much easier. When a door doesn’t latch properly, it's usually because the door has sagged in the opening, making it so the strike doesn’t line up with the hole in the jamb of the door, called the strike plate mortise.
To know if that’s the case, you can typically just look at the strike plate to get an idea of whether or not things are lined up properly. You’ll notice that the metal will be worn where the strike hits; if this worn area doesn’t line up with the middle of the strike plate, it’s out of alignment.
Try the easy stuff first
Before trying any fancy repairs, start by making sure the hinges are tight. If the hinges are loose, the door will sag. The fix is to simply tighten the screws; that's the easiest fix you could hope for. If the screws are stripped out, continue reading.
If the door strike almost lines up properly but it’s off by just a little bit, there’s a trick to sometimes persuade the door back into place without much effort. Simply remove one of the smaller screws from the uppermost hinge and replace it with a big 3” screw. Use an impact driver (or a drill if you don't have one) to drive this screw all the way through the jamb and into the framing at the side of the door. Sometimes this will be just enough to pull the door back into working order. If that doesn’t do it, the next step is to reposition the strike plate.
Reposition the strike plate
The tricky part about repositioning a strike plate is that something will need to be done with the old screw holes. The new position of the strike plate will typically be about 1/8” lower, which means there is a good chance that the new screws will want to drift over into the old screw holes, making for loose hardware. Of course, you could always just put some monster 3” screws in the strike plate and hope they don't drift, but there’s another less aggressive way of doing this that I prefer.
For this example, I’ve taken photos of the strike plate on a new exterior door that I installed at my own house. The problem with my strike plate was that I installed it just a hair too close to the frame, making it so my door latched too tightly. This was good from an air leakage perspective, as the weatherstripping made a very tight seal, but with the weatherstripping pushing against the latch, my kids couldn't open the door from the outside. It was too tight. The fix for this was to move the strike just a little bit away from the door. See below.
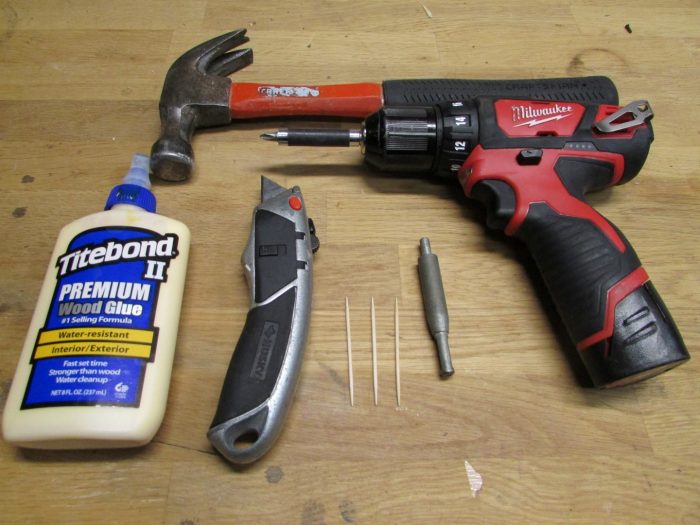
For this project, you'll need three toothpicks, a hammer, some wood glue, a drill, and a utility knife. A self-centering drill bit, also known as a hinge bit, is also recommended but not absolutely necessary. You may also need a wood chisel or a power tool that will do the job of a chisel.
In the photos above I only had to slide the strike plate away from the door jamb a little bit, so I was able to work with the existing mortise. If I had needed to move the strike plate down, I would have had to remove a small amount of wood for the strike to remain properly recessed.
Start by removing the screws from the strike plate and it to a new position that will allow the door to latch properly. If some wood needs to be removed from the door jamb, do it now. A wood chisel will work, but if you own a small power tool like a Dremel® or a RotoZip®, you can use it like a router to do this in style.
Next, fill the old screw holes by breaking the toothpicks in half, dabbing some wood glue on them, and tapping them into the holes. Three will fit in a hole. Once they're jambed jammed in there, cut the ends off with a knife.
Now let the glue dry overnight and finish the project tomorrow. You may not have to wait, but I wouldn't know. I've always waited. Next, place the strike plate into the correct position on the door jamb, and use a self-centering drill bit to drill the new holes.
The nice thing about this type of drill bit is that the holes get placed exactly in the middle of the strike plate screw holes, makign it so the strike plate stays exactly where it needs to be. If you don't have a self-centering bit, you can also use an awl to get the holes started exactly where they need to be, and then either force the screws into place without pre-drilling or use a 5/64" drill bit to make nice pilot holes for the screws.
Now put the screws in and you're done. If you did it right, your door will latch properly. If not, you'll have to utter a few four-letter words and start over.


